
Arrange the left menu
- Purpose
- Set the order of the left menu for everyone, hide items you do not need and tuck less-used ones under See more.
- Who is this for
- Admins
- Permissions
- Admin role.
The left menu is how everyone reaches modules and tables. You decide its order, which items are hidden and which are collapsed under See more.
How it works
You edit the menu in the Navigation card on Administration → General. Every menu destination is one row in a single list, with its icon and the name the menu shows. Rows for tables use your workspace's own words, so a renamed table appears under its new name (see Terminology).
Changes are staged. Nothing changes for anyone, including you, until you click Save. If you leave the page without saving, the staged changes are discarded.
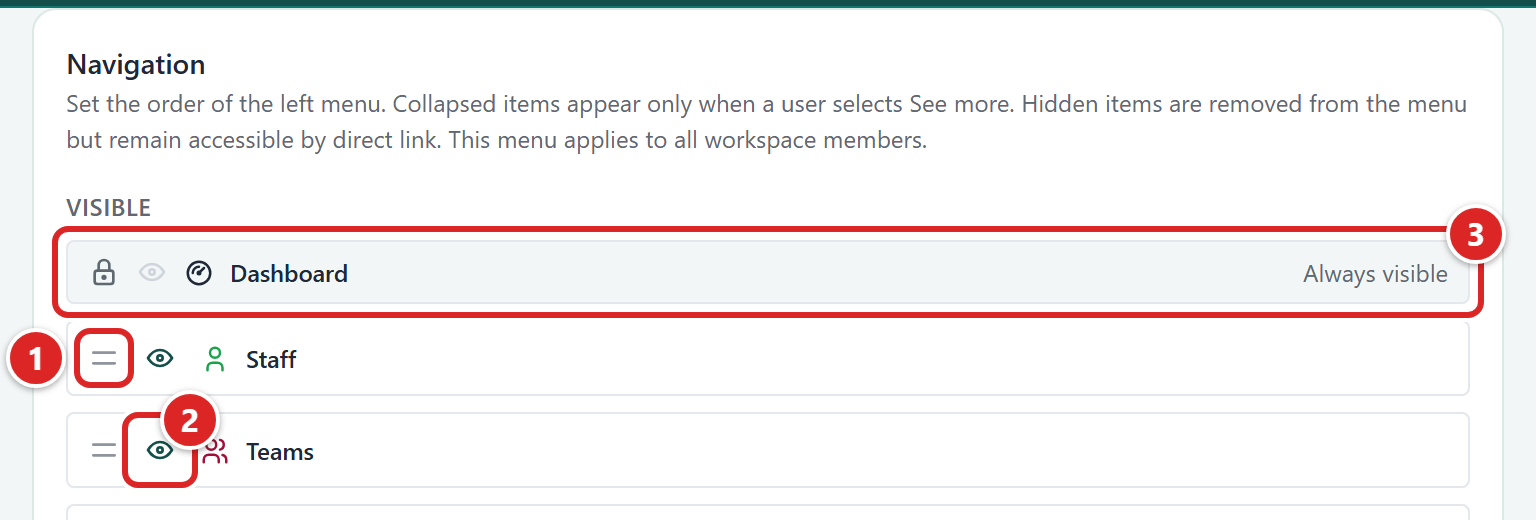
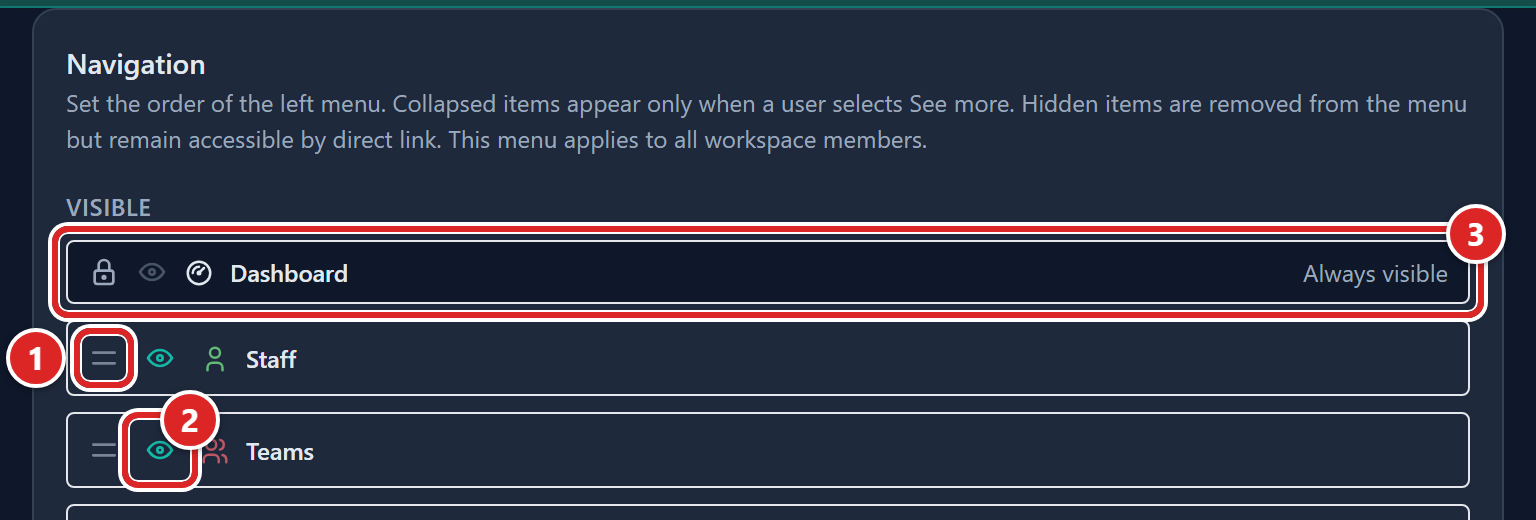
- The drag handle: drag the row to a new position.
- The eye icon: hides or shows the item.
- Dashboard, marked Always visible. It has no handle and no hide control.
| Item state | What members see |
|---|---|
| Visible | The item sits in the main part of the menu, in your order. |
| Collapsed under See more | The item appears only after a member clicks See more. |
| Hidden | The item is removed from the menu. |
Dashboard is always first and always shown.
Reorder the menu
- Open Administration → General.
- On the Navigation card, drag a row by its handle to a new position.
- Click Save. The new order shows in the left menu for everyone.
To move a row with the keyboard, focus its handle, press Space to pick the row up, use the arrow keys to move it and press Space to drop it.
If Save is greyed out, there is nothing staged yet. Hover over it to see why.
Hide an item from the menu
- In the Navigation card, click the eye icon on the row you want to hide.
- In the confirmation, click Hide.
- Click Save.
Hidden rows are dimmed in the list. A line above the list shows how many items are hidden. To show an item again, click its eye icon. Showing an item needs no confirmation.
Collapse items under See more
Use this for pages that people need now and then.
- In the Navigation card, drag a row from Visible into Collapsed under See more. An empty group shows a hint that tells you where to drop.
- Optional: drag rows within the group to set their order.
- Click Save.
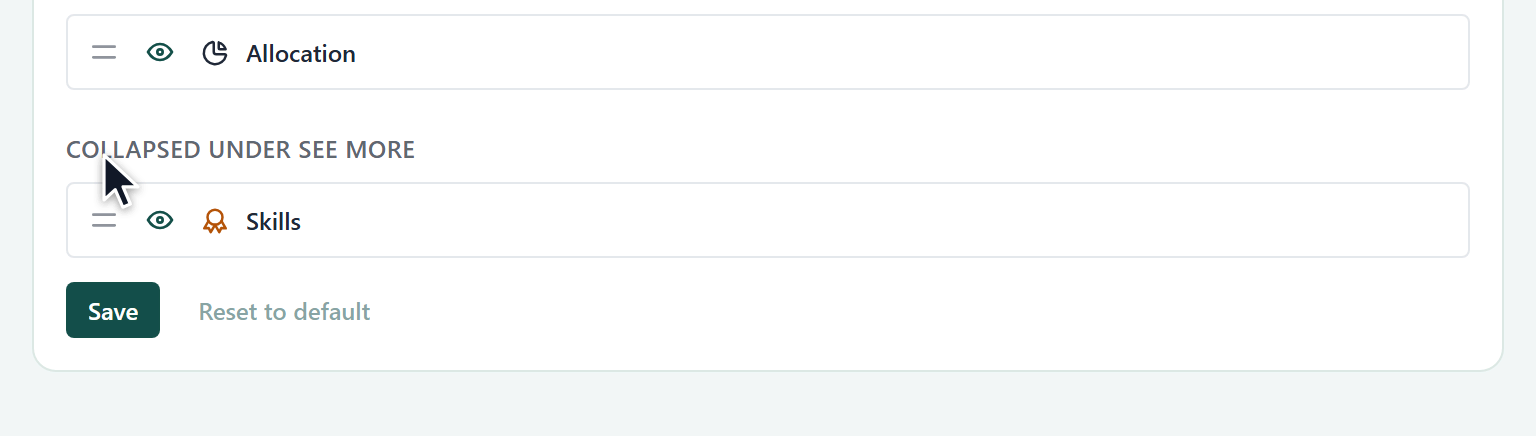
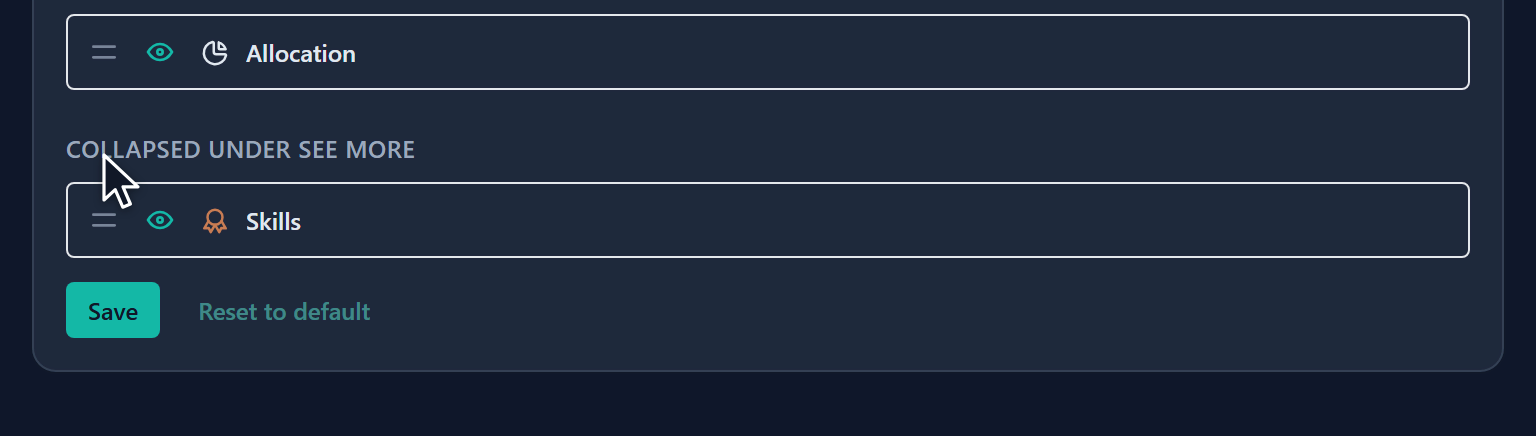
Members then see a See more row at the end of the main menu, with the number of items under it, for example See more (3). Clicking it opens the section, and the row moves to the bottom as See less.
Each member's open or closed choice is remembered in their own browser. The section opens by itself when the page a member is on is one of its items.
A hidden item never shows, even under See more, and is not counted.
Reset the menu
Use this to undo your arrangement and go back to the standard order.
- In the Navigation card, click Reset to default. The list shows the standard order with nothing hidden and nothing under See more.
- Click Save. The standard menu shows for everyone.
Reset to default is greyed out when the menu is already at its default.
Good to know
- Admins are not exempt. A hidden item is hidden from your own menu too. You can always get back through the header gear to Administration → General.
- There is one menu for all members. Nobody has a personal layout.
- If two admins save at the same time, the last save wins.
- If a module is switched off in Turn features on or off, its menu item disappears for everyone, Admins included. Its row stays in the Navigation card in its place, greyed and marked Feature disabled, with no drag handle and no eye icon. Turn the module back on and the item returns where it was.