
Create and manage customized tabs
Create, save, and manage custom tabs to maintain personalized Projects table views for easier navigation and reporting.
📝Overview
Purpose
- Organize Staff, Teams, Programs, or Projects table views with custom tabs to quickly access frequenlty used filters and flayours
- Save time by keeping tailored views for different purposes
Who is this for
- Any user who frequently uses Staff, Teams, Programs, or Projects table
- Users who want to maintain multiple veiws without manually applying filters and customizations each time
Pre‑requisites
- Existing data in the platform for the respective modules
Permissions required
- Manage access to the respective modules
📹Demo walkthrough
💭How‑to guide
⚠️ Important Reminders
- Customizing table views and managing tabs follow the same steps across Staff, Teams, Programs, and Projects
- Fields may differ since custom fields are configured at the module level
- In this guide, we are using the Projects module as an example
Step 1: Create a new tab
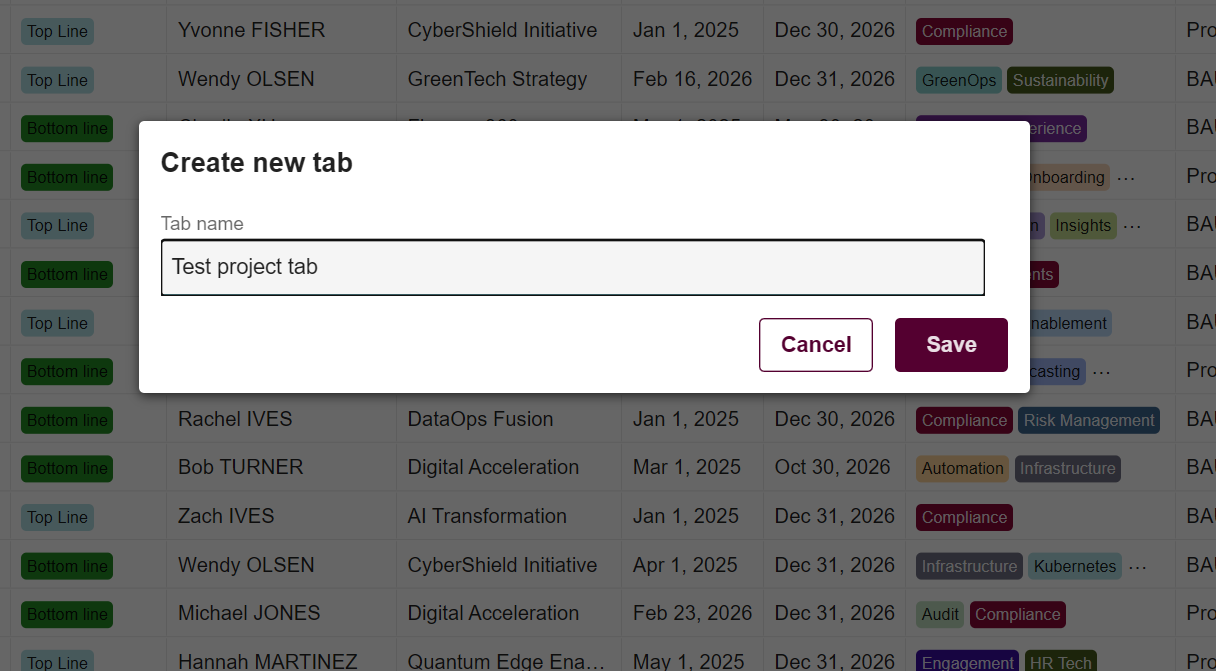
Click on the '...' (ellipsis) on the top-right corner and select Create new tab

and enter a name for your new tab once prompted.
Step 2: View your new tab
After naming your new tab, it should now appear in the top panel which in this case is 'Test project tab'.

Step 3: Apply filters and customizations
With this new tab, you can now apply filters or customize your view as needed.
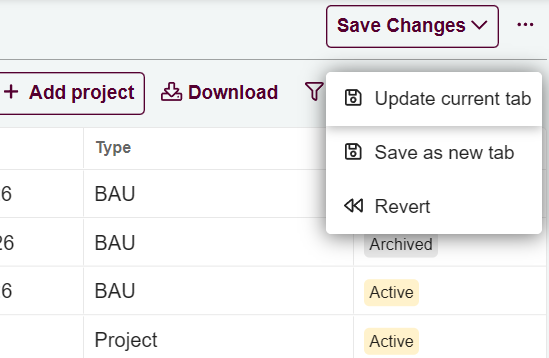
After applying filters or customizations, click Save changes on the upper-right corner and click on Update current tab
💡 Tip:
You can also save the view as a new tab using Save as new tab instead of updating the current tab.
Step 4: Manage your tabs
Click the ellipsis (...) to see management options for your tabs:
- Create new tab – add a new custom tab for a different view
- Rename tab – change the name of the current tab you're in
- Save as new tab – save the current view into a new tab
- Save tab – update the current tab with the latest changes
- Duplicate tab – create a copy of the existing tab you're currently in
- Delete tab – remove the existing tab you're currently in
- Reorder tabs – change the order of tabs in the top panel for easier access