
Manage customized tabs
Customize your tabs and save, manage, and quickly access views tailored to your workflow.
📝Overview
Purpose
- Organize and personalize allocation views by creating, customizing, and managing tabs for frequently used filters and/or visualized allocation data
Who is this for
- PMOs, managers, or staff who regularly view allocations and want quick access to custom views
Pre‑requisites
- Familiarity with allocation filters and display customizations
Permissions required
- Access and permission to manage allocations
📹Demo walkthrough
💭How‑to guide
Step 1: Create a new tab
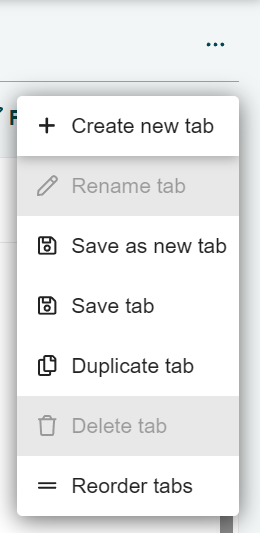
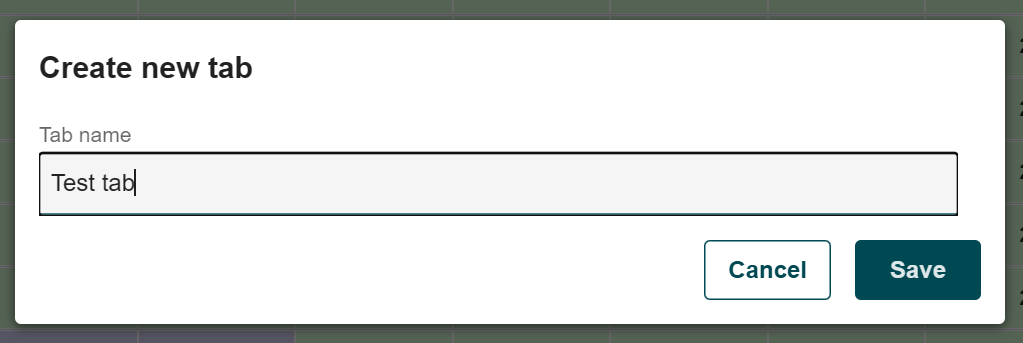
Click on the '...' (ellipsis) on the top-right corner and select Create new tab
and enter a name for your new tab once prompted.
Step 2: View your new tab
After naming your new tab, it should now appear in the top panel which in this case is 'Test tab'.

Step 3: Customize and save changes to the tab
With this new tab, you can now apply filters or customize your view as needed.
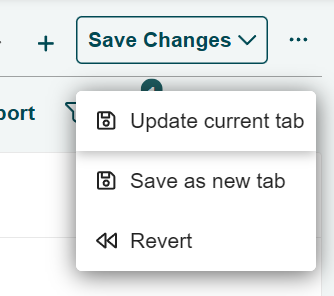
After applying filters or customizations, click Save changes on the top-right corner and click on Update current tab.
💡 Tip:
You can also save the view as a new tab using Save as new tab instead of updating the current tab.
Step 4: Manage your tabs
Click the ellipsis (...) to see management options for your tabs:
- Create new tab – add a new custom tab for a different view
- Rename tab – change the name of the current tab you're in
- Save as new tab – save the current view into a separate tab
- Save tab – update the current tab with the latest changes
- Duplicate tab – create a copy of the existing tab you're currently in
- Delete tab – remove the existing tab you're currently in
- Reorder tabs – change the order of tabs in the top panel for easier access