Create a new project & view its details
Add a new project to the platform to start tracking its progress, assignments, and associated data.
📝Overview
Purpose
- Create new projects in the platform for a centralized view to track work and progress
Who is this for
- PMOs and Leads responsible for initiating projects
- Admins or users with permissions to manage projects
Pre‑requisites
- Knowledge of organization's project details
Permissions required
- Manage access to the Projects module
📹Demo walkthrough
💭How‑to guide
Step 1: Open the +Add project window
- Click the '+ Add project' button in the upper-right corner of the Projects module
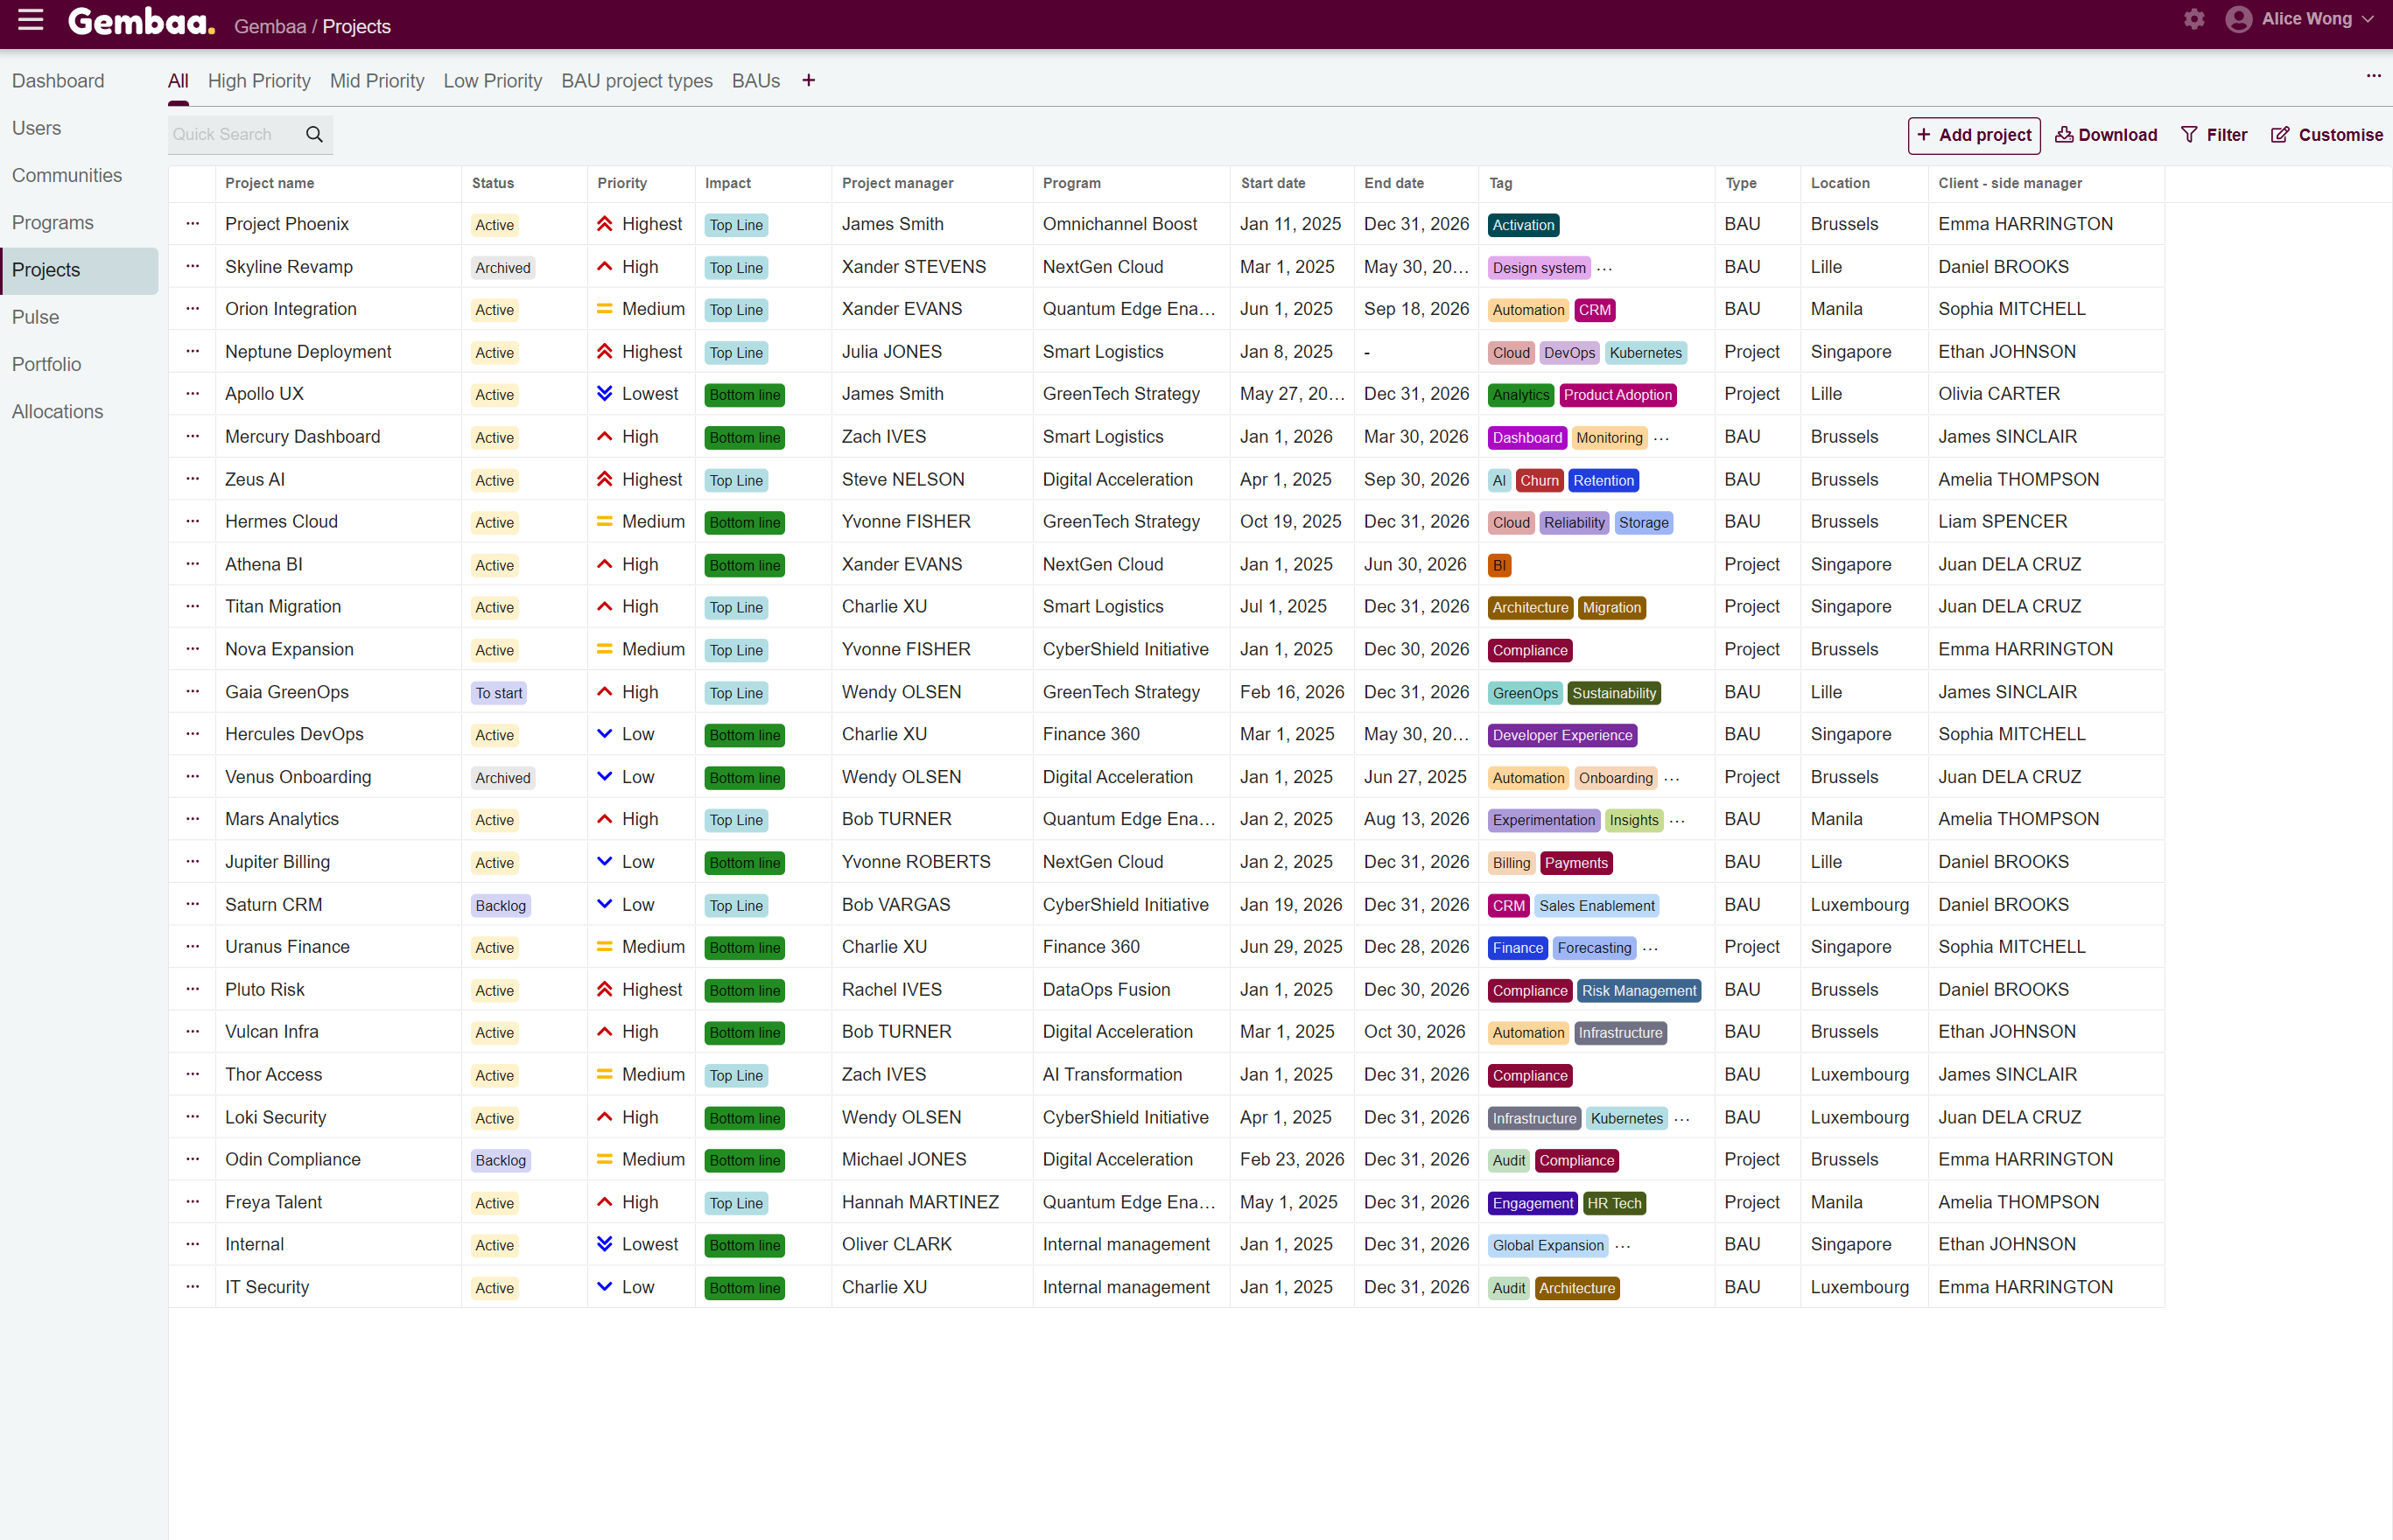
- A dialog box will open where you can enter project details
Step 2: Fill in your project information
Complete the required fields with '*' and/or any relevant optional fields:
- Project name - e.g., Project X
- Program - Relevant program the Project is associated with, e.g., AI Transformation
- Status - e.g., Backlog
- Custom fields - Any additional info defined for your workspace
✍️ Note:
Custom fields allow capturing extra project information. Creating and managing them is covered in a separate guide under Admin.

Step 3: Save the Project
Once all required information is completed, click Save. The new project will now appear in your table.
💡 Tip:
You can quickly locate the newly created project by using the Quick Search on the upper left or by scrolling through the project table list.

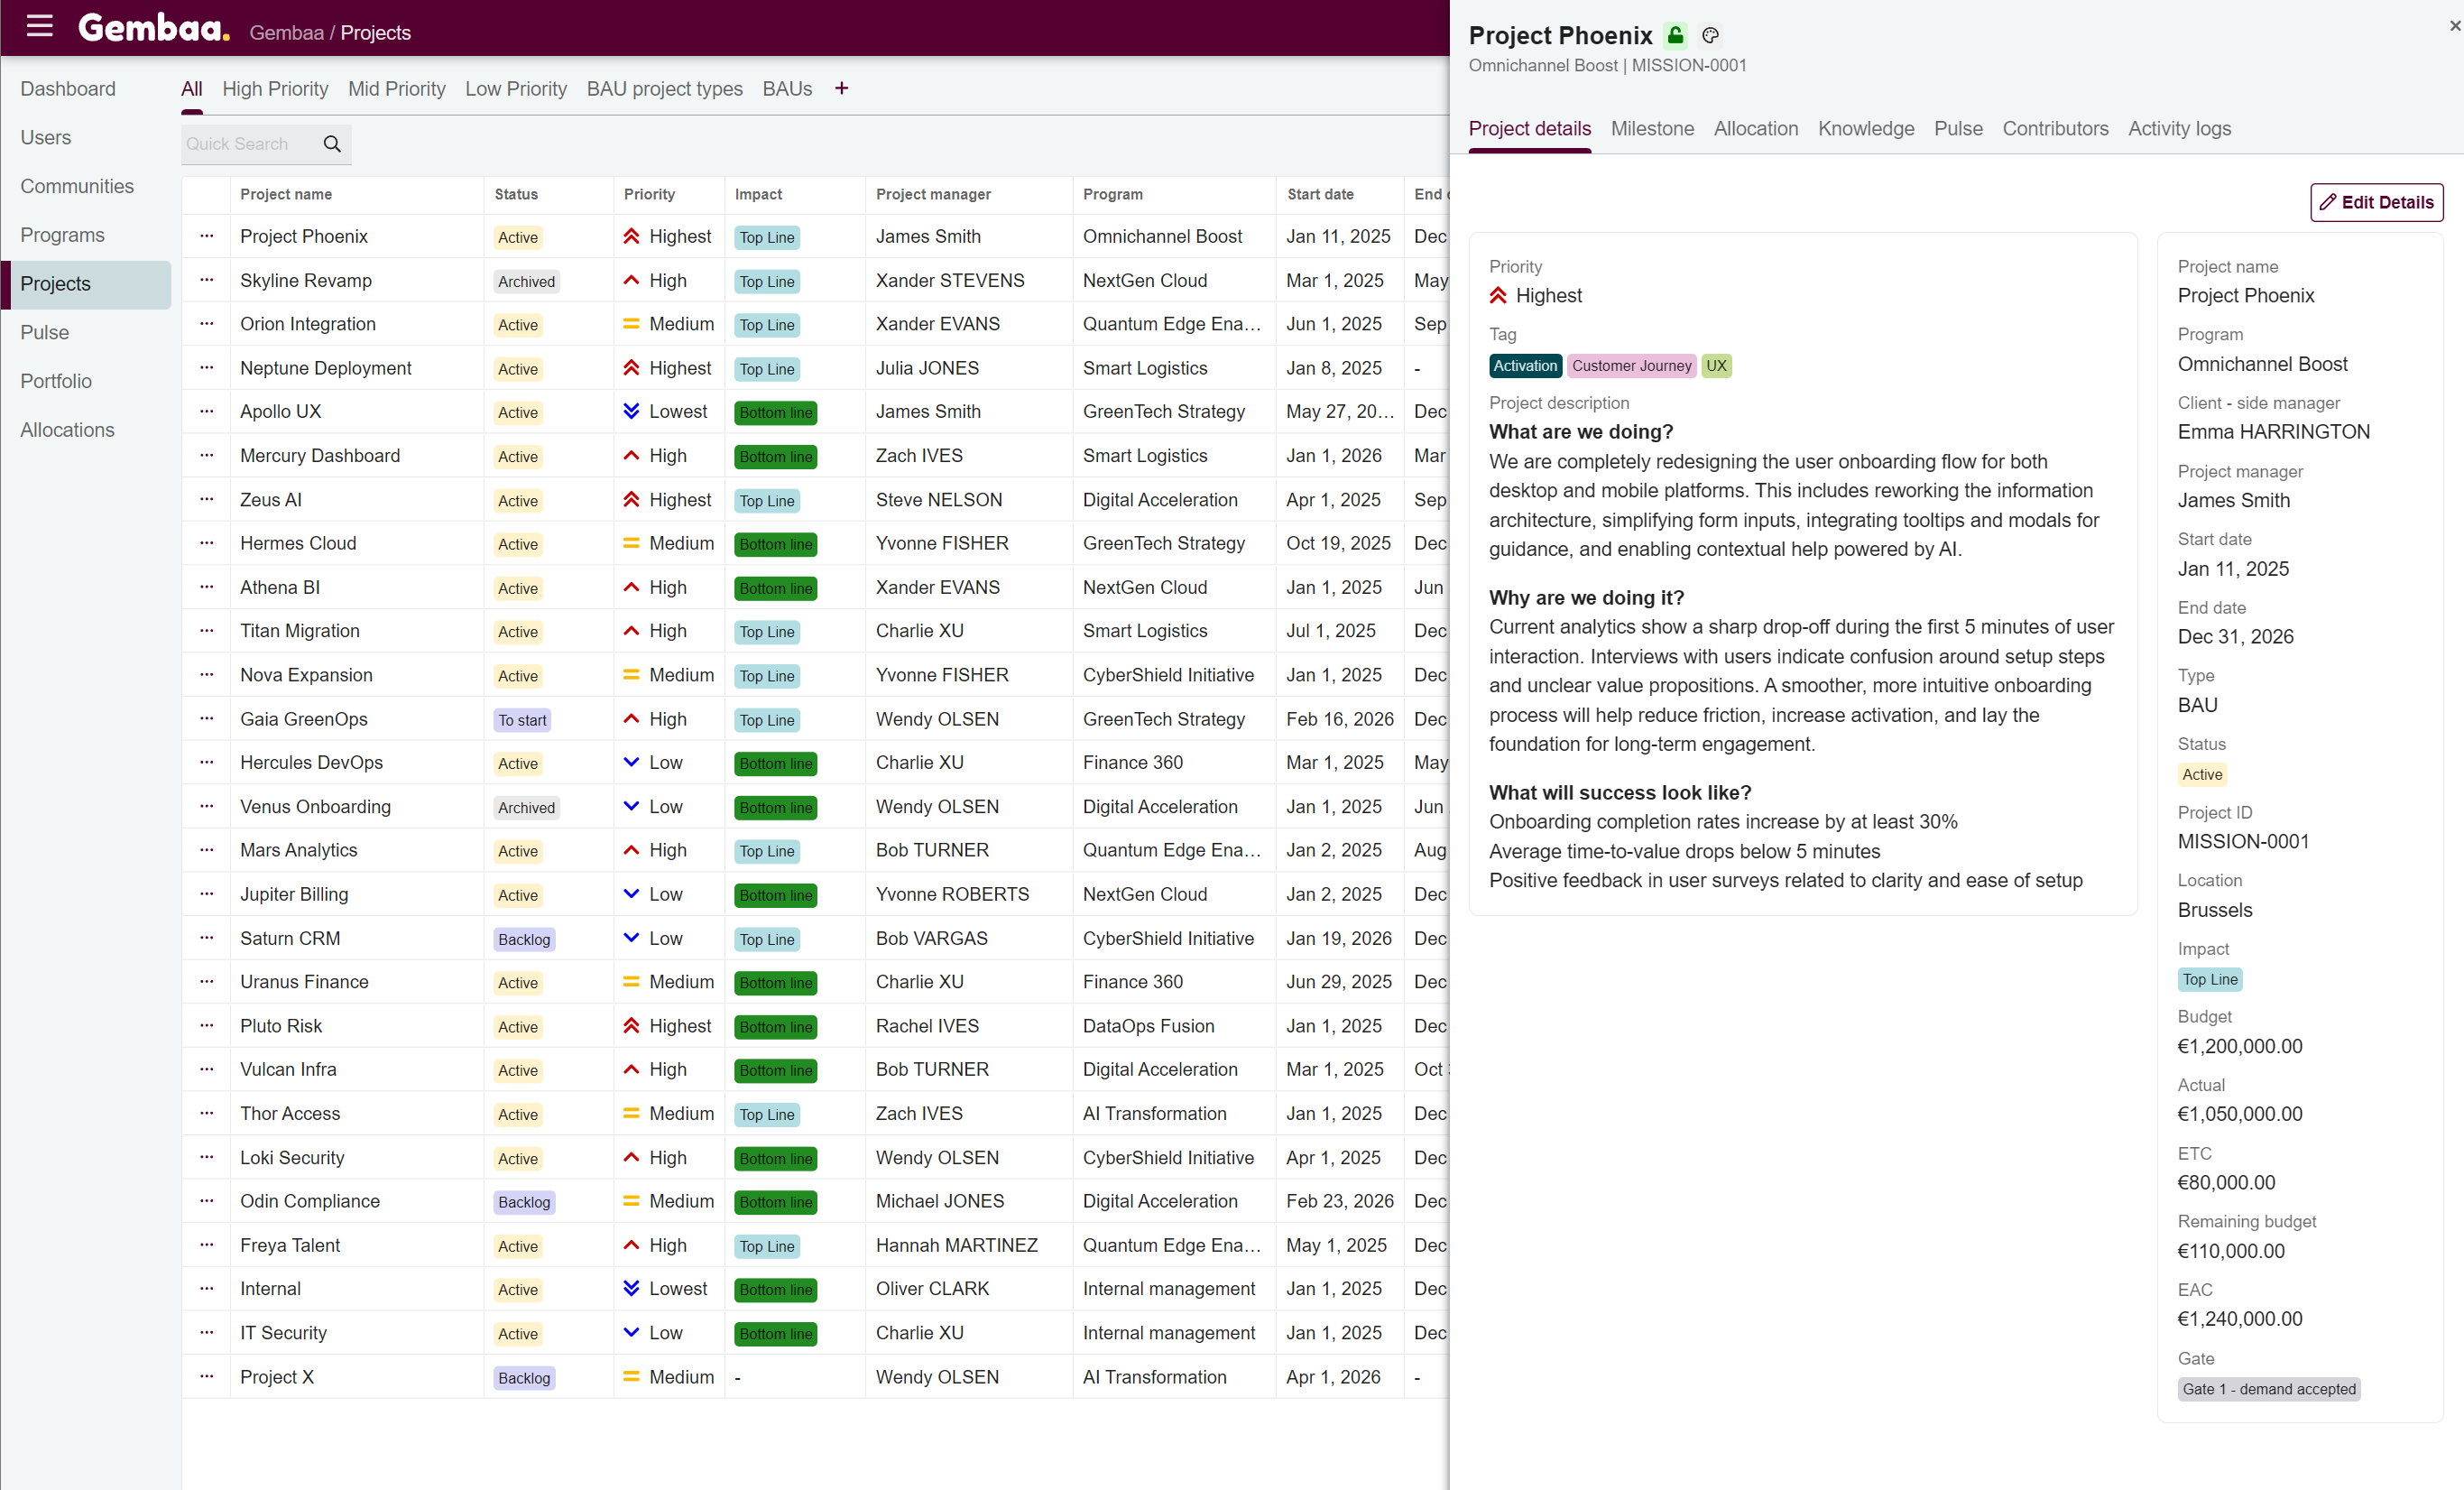
Step 4: View project details
To open a detailed view of project information, click on the Project name. Here you can explore multiple tabs related to your project:
- Details - project overview and status
- Milestones -track key project goals and deadlines
- Allocations - view staff assigned to the project and their roles/dates
- Knowledge - relevant resources, documents, or notes attached to the project
- Pulse - performance indicators for the project
- Contributors - list of staff involved and their responsibilities
- Activity logs - chronological record of updates and actions on the project
✍️ Note:
Each tab is explained in more detail in separate guides in this Knowledge Base for easy reference.