
Customize your table view
Modify, filter, and save table layouts to focus on the most relevant information for Staff, Teams, Programs, or Projects, creating a personalized and reusable view.
📝Overview
Purpose
- Adjust how tables are displayed, filtered, and saved across Staff, Teams, Programs, and Projects to improve visibility and workflow.
Who is this for
- Users who review, manage, or report on multiple entities and want a personalized table layout
Pre‑requisites
- Existing records in the module
Permissions required
- View access to Staff, Teams, Programs, and Projects tab
📹Demo walkthrough
💭How‑to guide
⚠️ Important Reminders
- Customizing table views follows the same steps across Staff, Teams, Programs, and Projects
- Other modules support table customization, but available options can vary
- Field options may differsince custom fields are configured at the module level
- In this guide, we are using the context Projects module as an example
Step 1: Open the customize panel
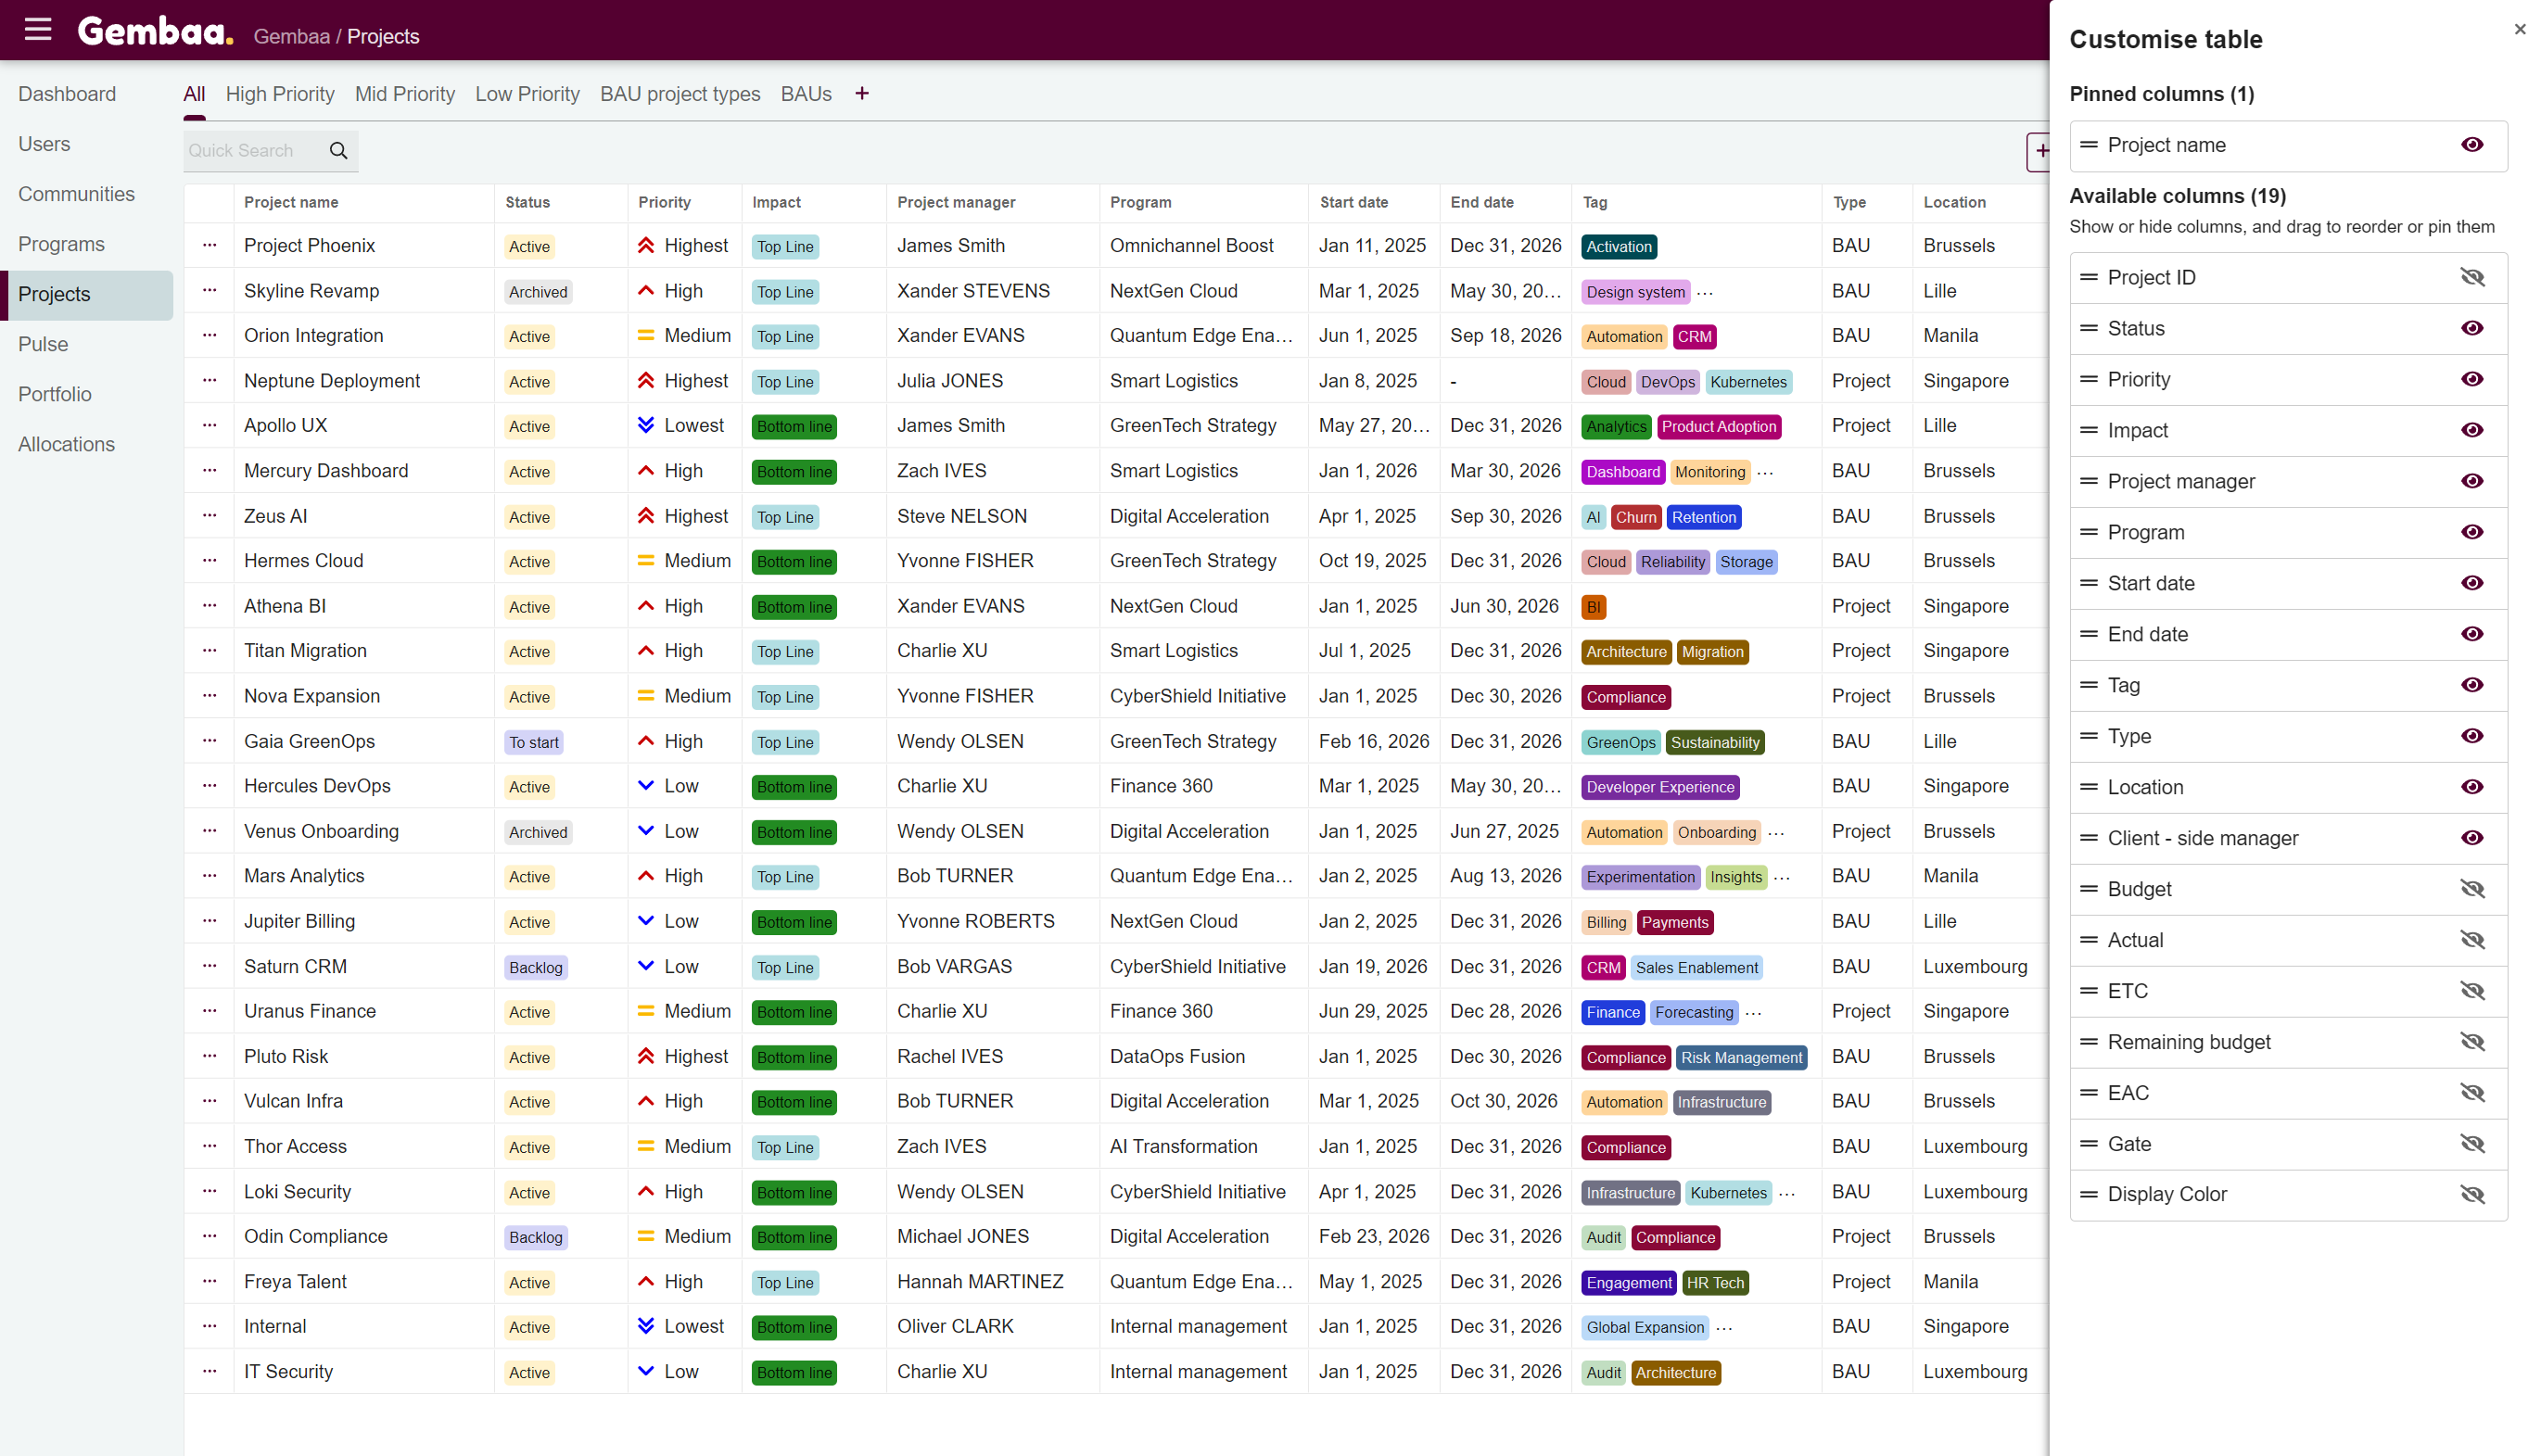
Navigate to the module from the side navigation bar of which you want to customize your view. On the Projects module, click on the Customize button on the upper right corner to open the customization panel

Step 2: Configure your columns
Once the customization panel appears, you can adjust how columns appear in the projects table, taking note, changes reflect instantly:
- Pin columns – drag a field into the Pinned columns area to keep it fixed on the left side of the table, similar to Freeze Panes in Excel, so it remains visible while scrolling
- Hide or unhide columns – control which project fields are visible in the table using the 👁 icon
✍🏻 Note:
Hidden columns are also removed from filter criteria, so you will not be able to filter by that field unless it is visible
- Rearrange column order – drag fields to change the order in which columns appear in the table
Step 3: Save changes to the current tab
Changes made in the customization panel are temporary until you update the current tab view.
To save the configuration:
- Click on Save Changes
- Select update current tab to store the new layout
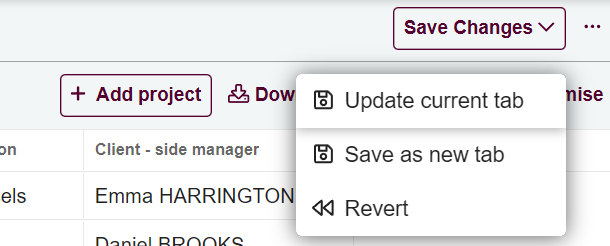
✍🏻 Note:
You can also save the configuration as a new tab instead of updating the current one. See Manage customized Project tabs for more details.