Filter table view
Filters are flexible tools that help you quickly locate specific records without changing the underlying data.
📝Overview
Purpose
- Narrow down table lists to see only the most relevant items that match a specific criteria
- Improve visibility and efficiency especially when managing large data
Who is this for
- Users who want to review and focus on a subset of Staff, Teams, Programs, or Projects based on certain criteria
Pre‑requisites
- Records already existing in the platform
Permissions required
- View access to the relevant modules
📹Demo walkthrough
💭How‑to guide
⚠️ Important Reminders
- Filtering table views follows the same steps across Staff, Teams, Programs, and Projects
- Field options may differ since custom fields are configured at the module level
- Hidden columns will not appear in filter criteria, so you cannot filter by fields that are hidden
- Filtered views are temporary unless saved as a tab. See Manage Customized Tabs for more information
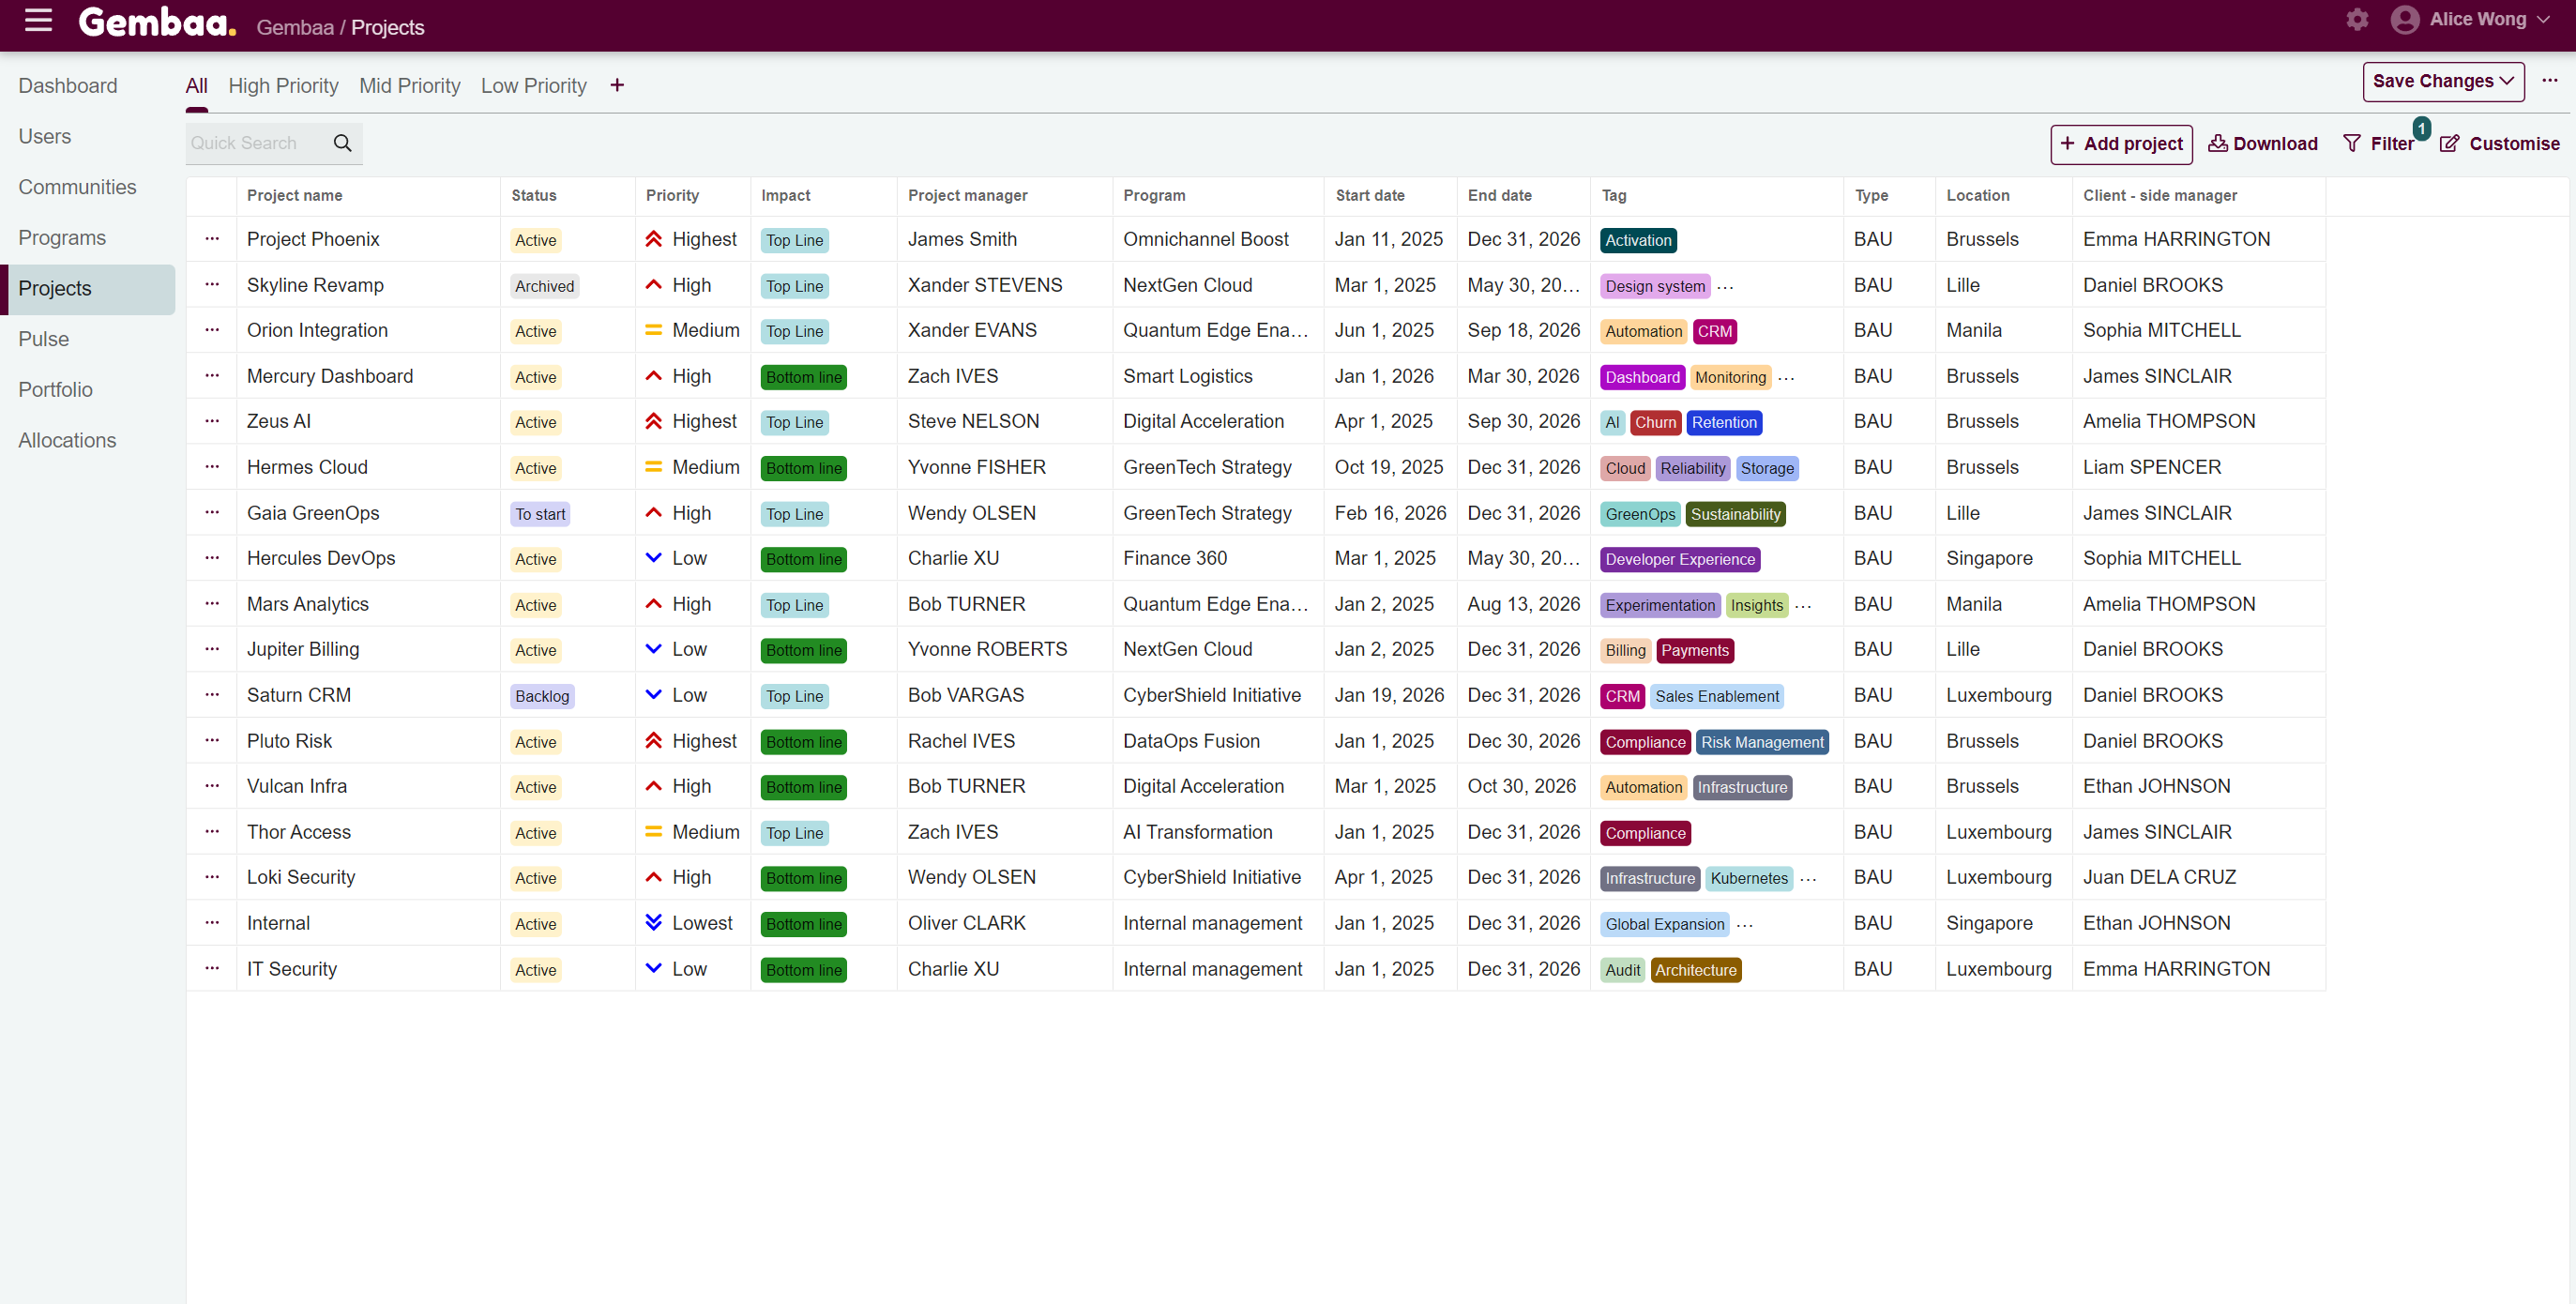
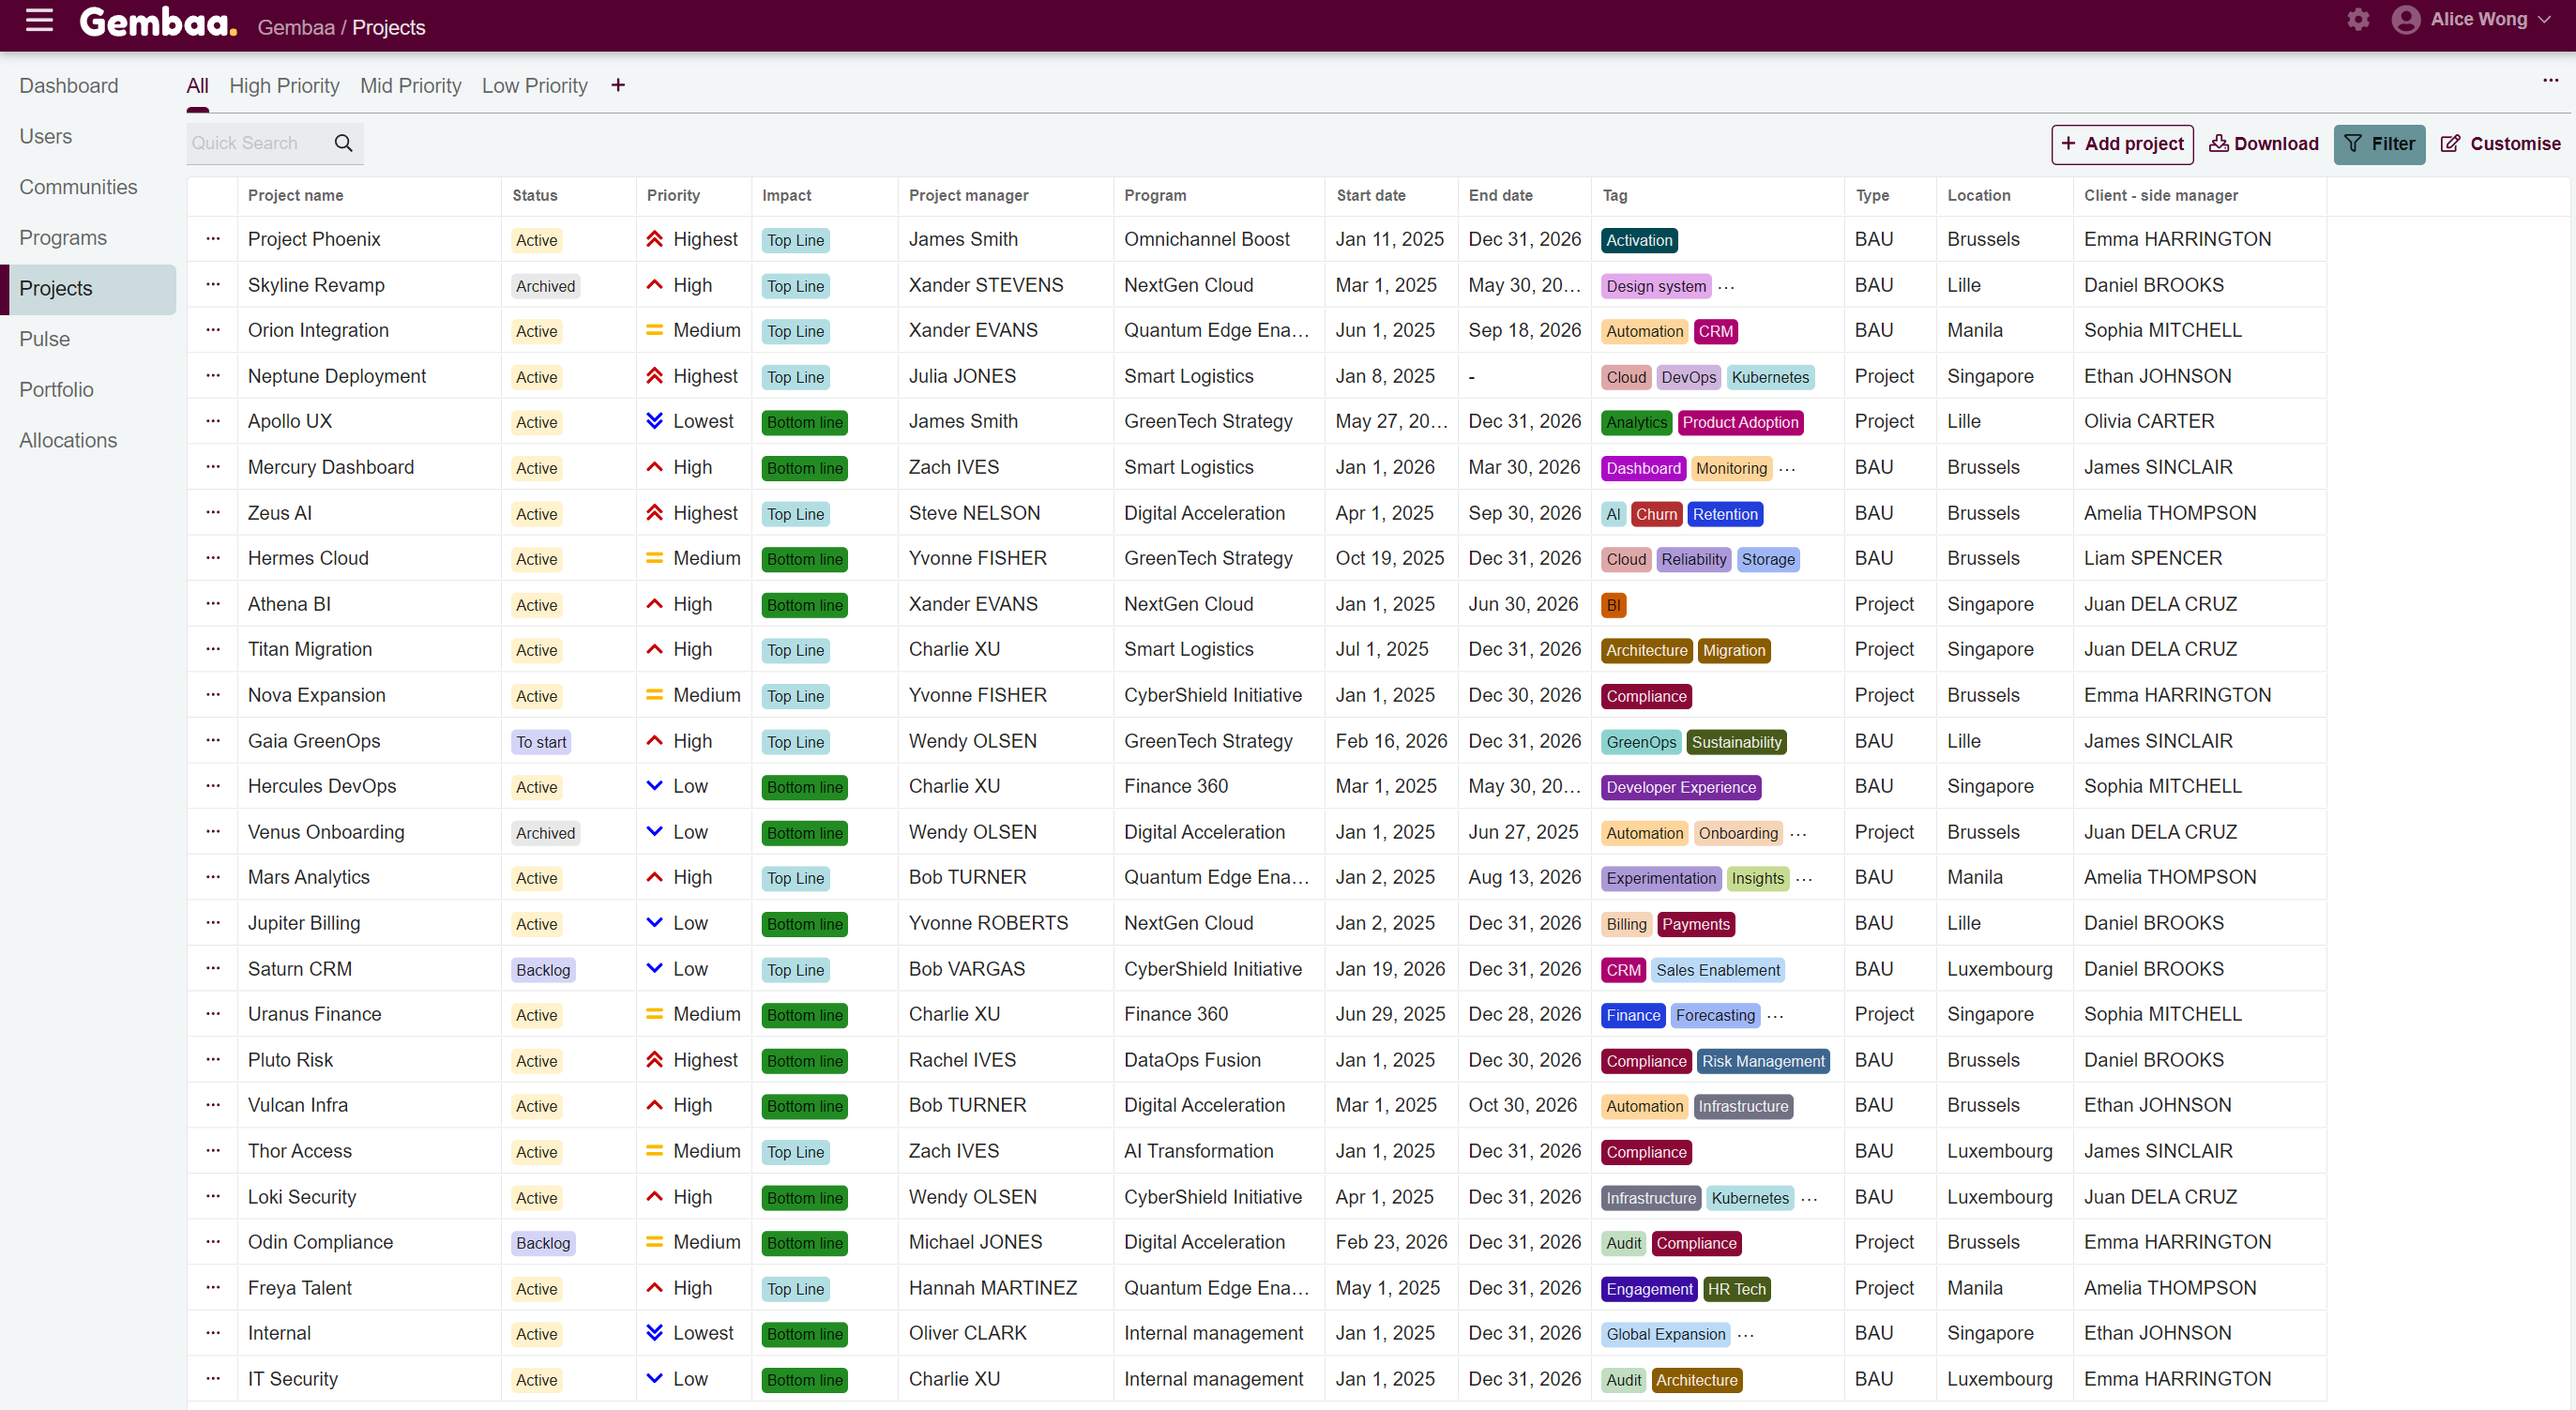
- In this guide, we are using the Projects module as an example
Step 1: Open the filter panel
On the Projects module, click on the 'Filter' button on the upper-right corner of the Projects table. This will display a panel of available filter categories.
Step 2: Select filter criteria
Choose the fields you want to filter by. In this example, we will filter using the 'Type' column, which contains project types such as BAU ort Project, and we want to see only BAU projects. To do this:
- Look for the field: Type
- Select crietia: Matches
- Selection option: BAU
✍️ Note:
If a column is hidden, it will not appear in the filter criteria. Make sure the column is visible if you want to filter by it.

Step 3: Apply filters
Select 'Apply' once you've configured your criteria. You will see the projects table view reflecting only the projects that match the set criteria.
✍️ Note:
Filtered views are temporary and will revert if you navigate away. To keep this view for future use, save it as a new tab. See
Manage Customized Tabs for more information.