Create and manage custom field
📝Overview
Purpose
- Configure custom fields to capture additional, organization-specific data across modules
- standardize how information is collected and displayed within the platform
Who is this for
- Admins responsible for configuring platform structure and data fields
Pre‑requisites
- Understanding of what data your organization needs
Permissions required
- Manage access to the Admin panel
📹Demo walkthrough
💭How‑to guide
Step 1: Open the Admin Panel
As an admin, click the gear icon beside your profile name, this opens the Admin panel.

Step 2: Navigate to Entities
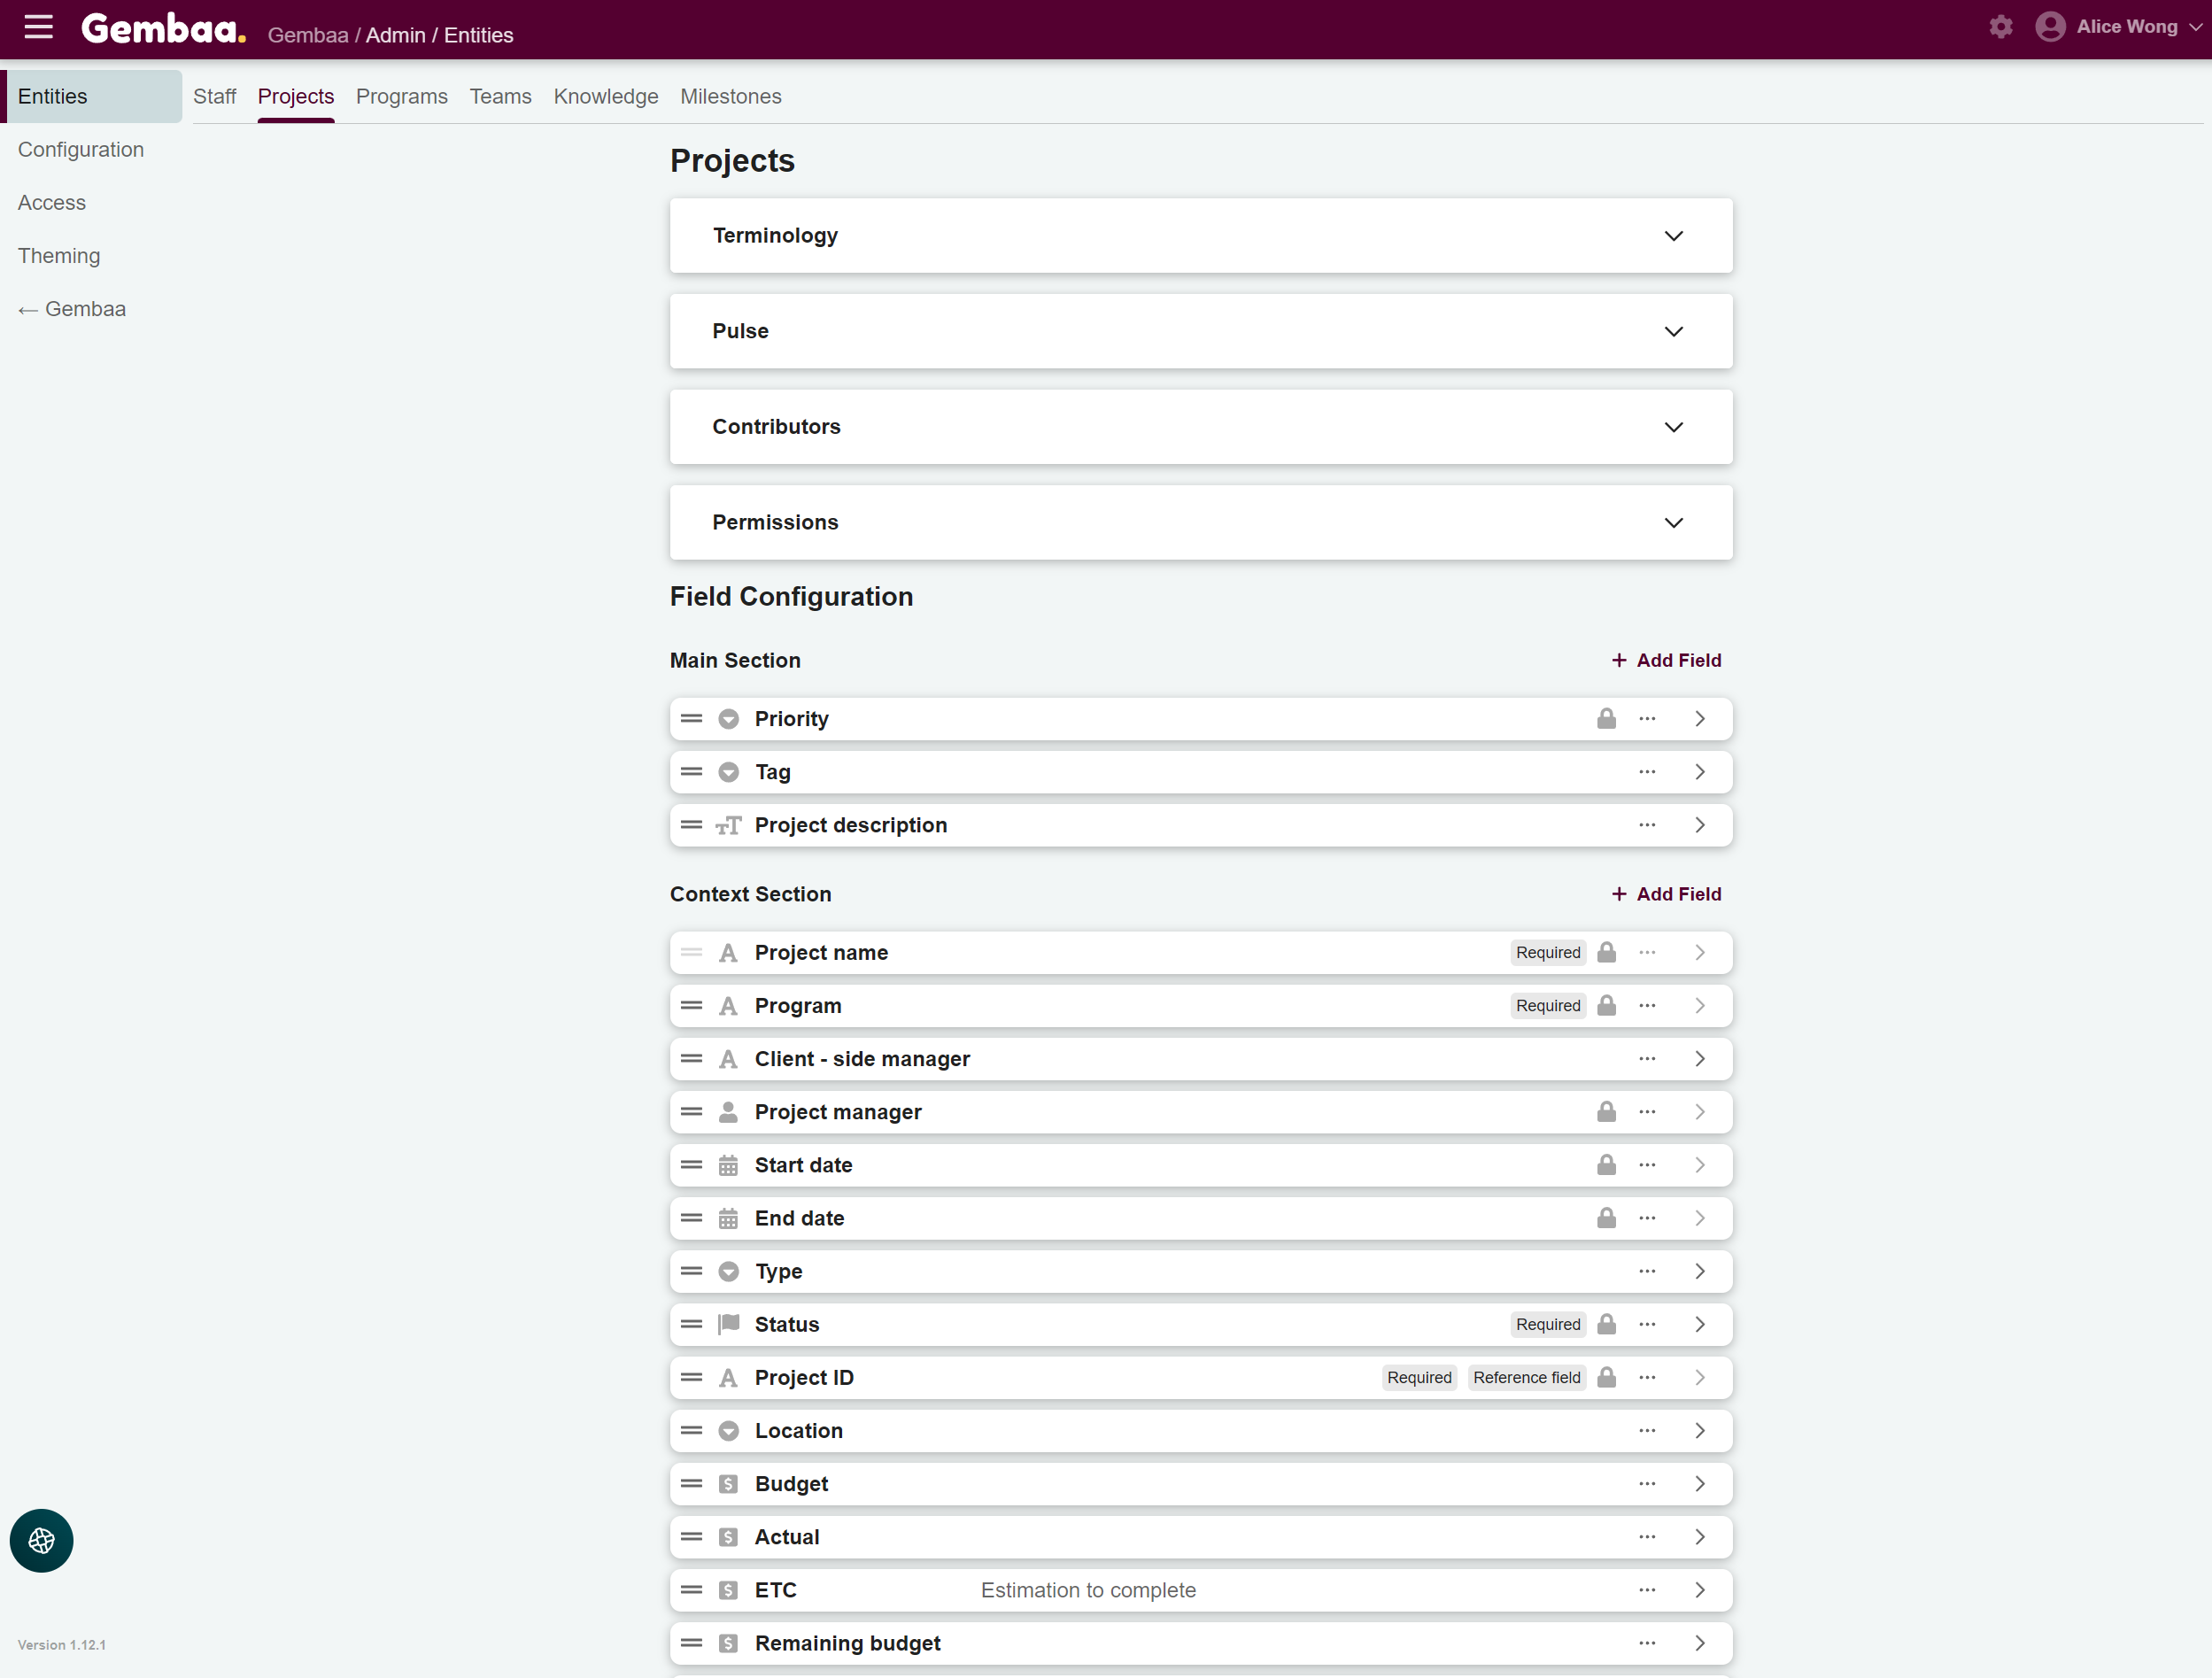
From the Admin panel navigation menu on the right, select Entities. Choose the module where you want to create custom fields, each module has its own tab and configurations.
Step 3: Click on the "+ Add field" button
Under the Field Configuration section, you will see a list of existing fields and on the right of each section (Main & Context) is the "+Add field" button.
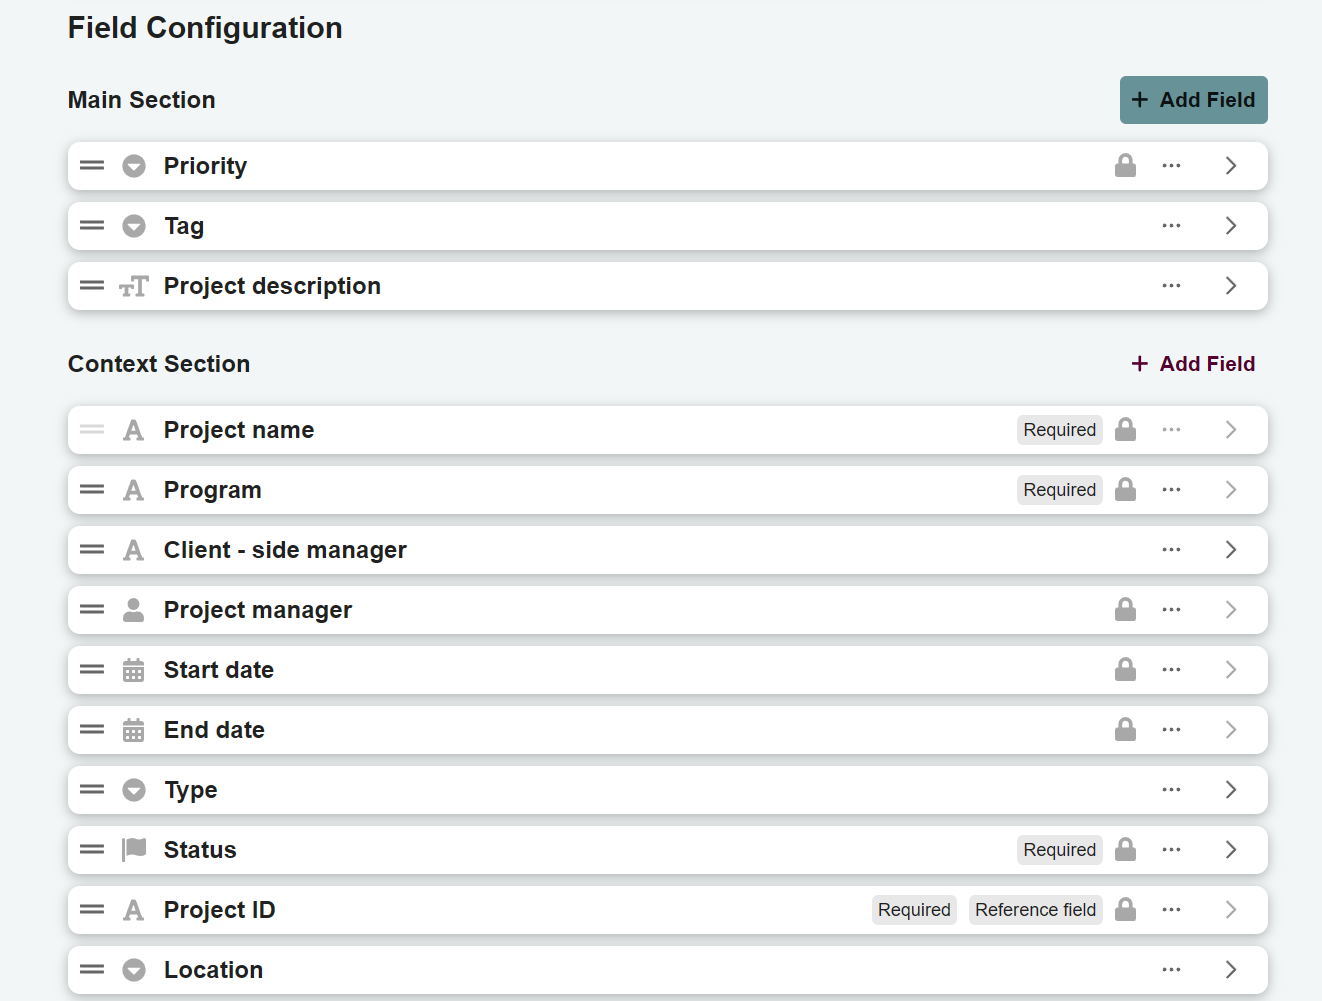
Learn more about Main vs Context sections
These sections refer to the layout you see when opening a record’s details panel (e.g. opening a project details view).
- Main section – the left, larger section used for primary details (key information about the project)
- Context section – the right, smaller section used for supporting or additional information
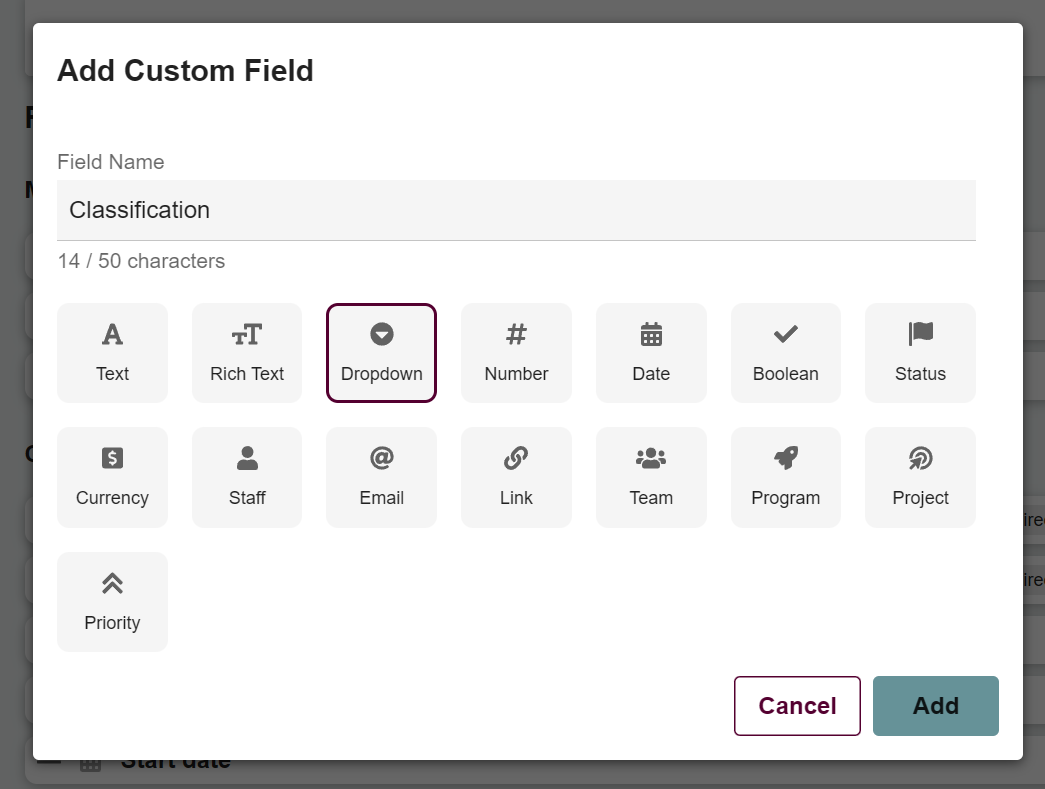
Step 4: Create your field
From step 3, a dialog box should appear where you can choose the respective field type (e.g., Rich Text, Dropdown, etc..). For this example, we're creating a Dropdown field named Classification.
Once you're done with choosing the type and name input, click Add.
Learn more about field types
Different field types allow you to capture and structure information in different ways depending on your business needs.
- Rich text – long-form text with formatting support such as bold, lists, or links
- Dropdown – allows users to select from predefined options
- Number – stores numeric values such as counts, quantities, or percentages
- Date – captures a specific calendar date
- Boolean – simple yes/no or true/false selection
- Status – tracks the current state of an item
- Currency – stores monetary values with currency formatting
- Staff – links or references a staff member in the platform
- Email – stores email addresses with email formatting
- Link – stores clickable URLs or website links
- Team – links or references a team in the platform
- Program – links or references a program in the platform
- Project – links or references a project in the platform
- Priority – categorizes importance levels
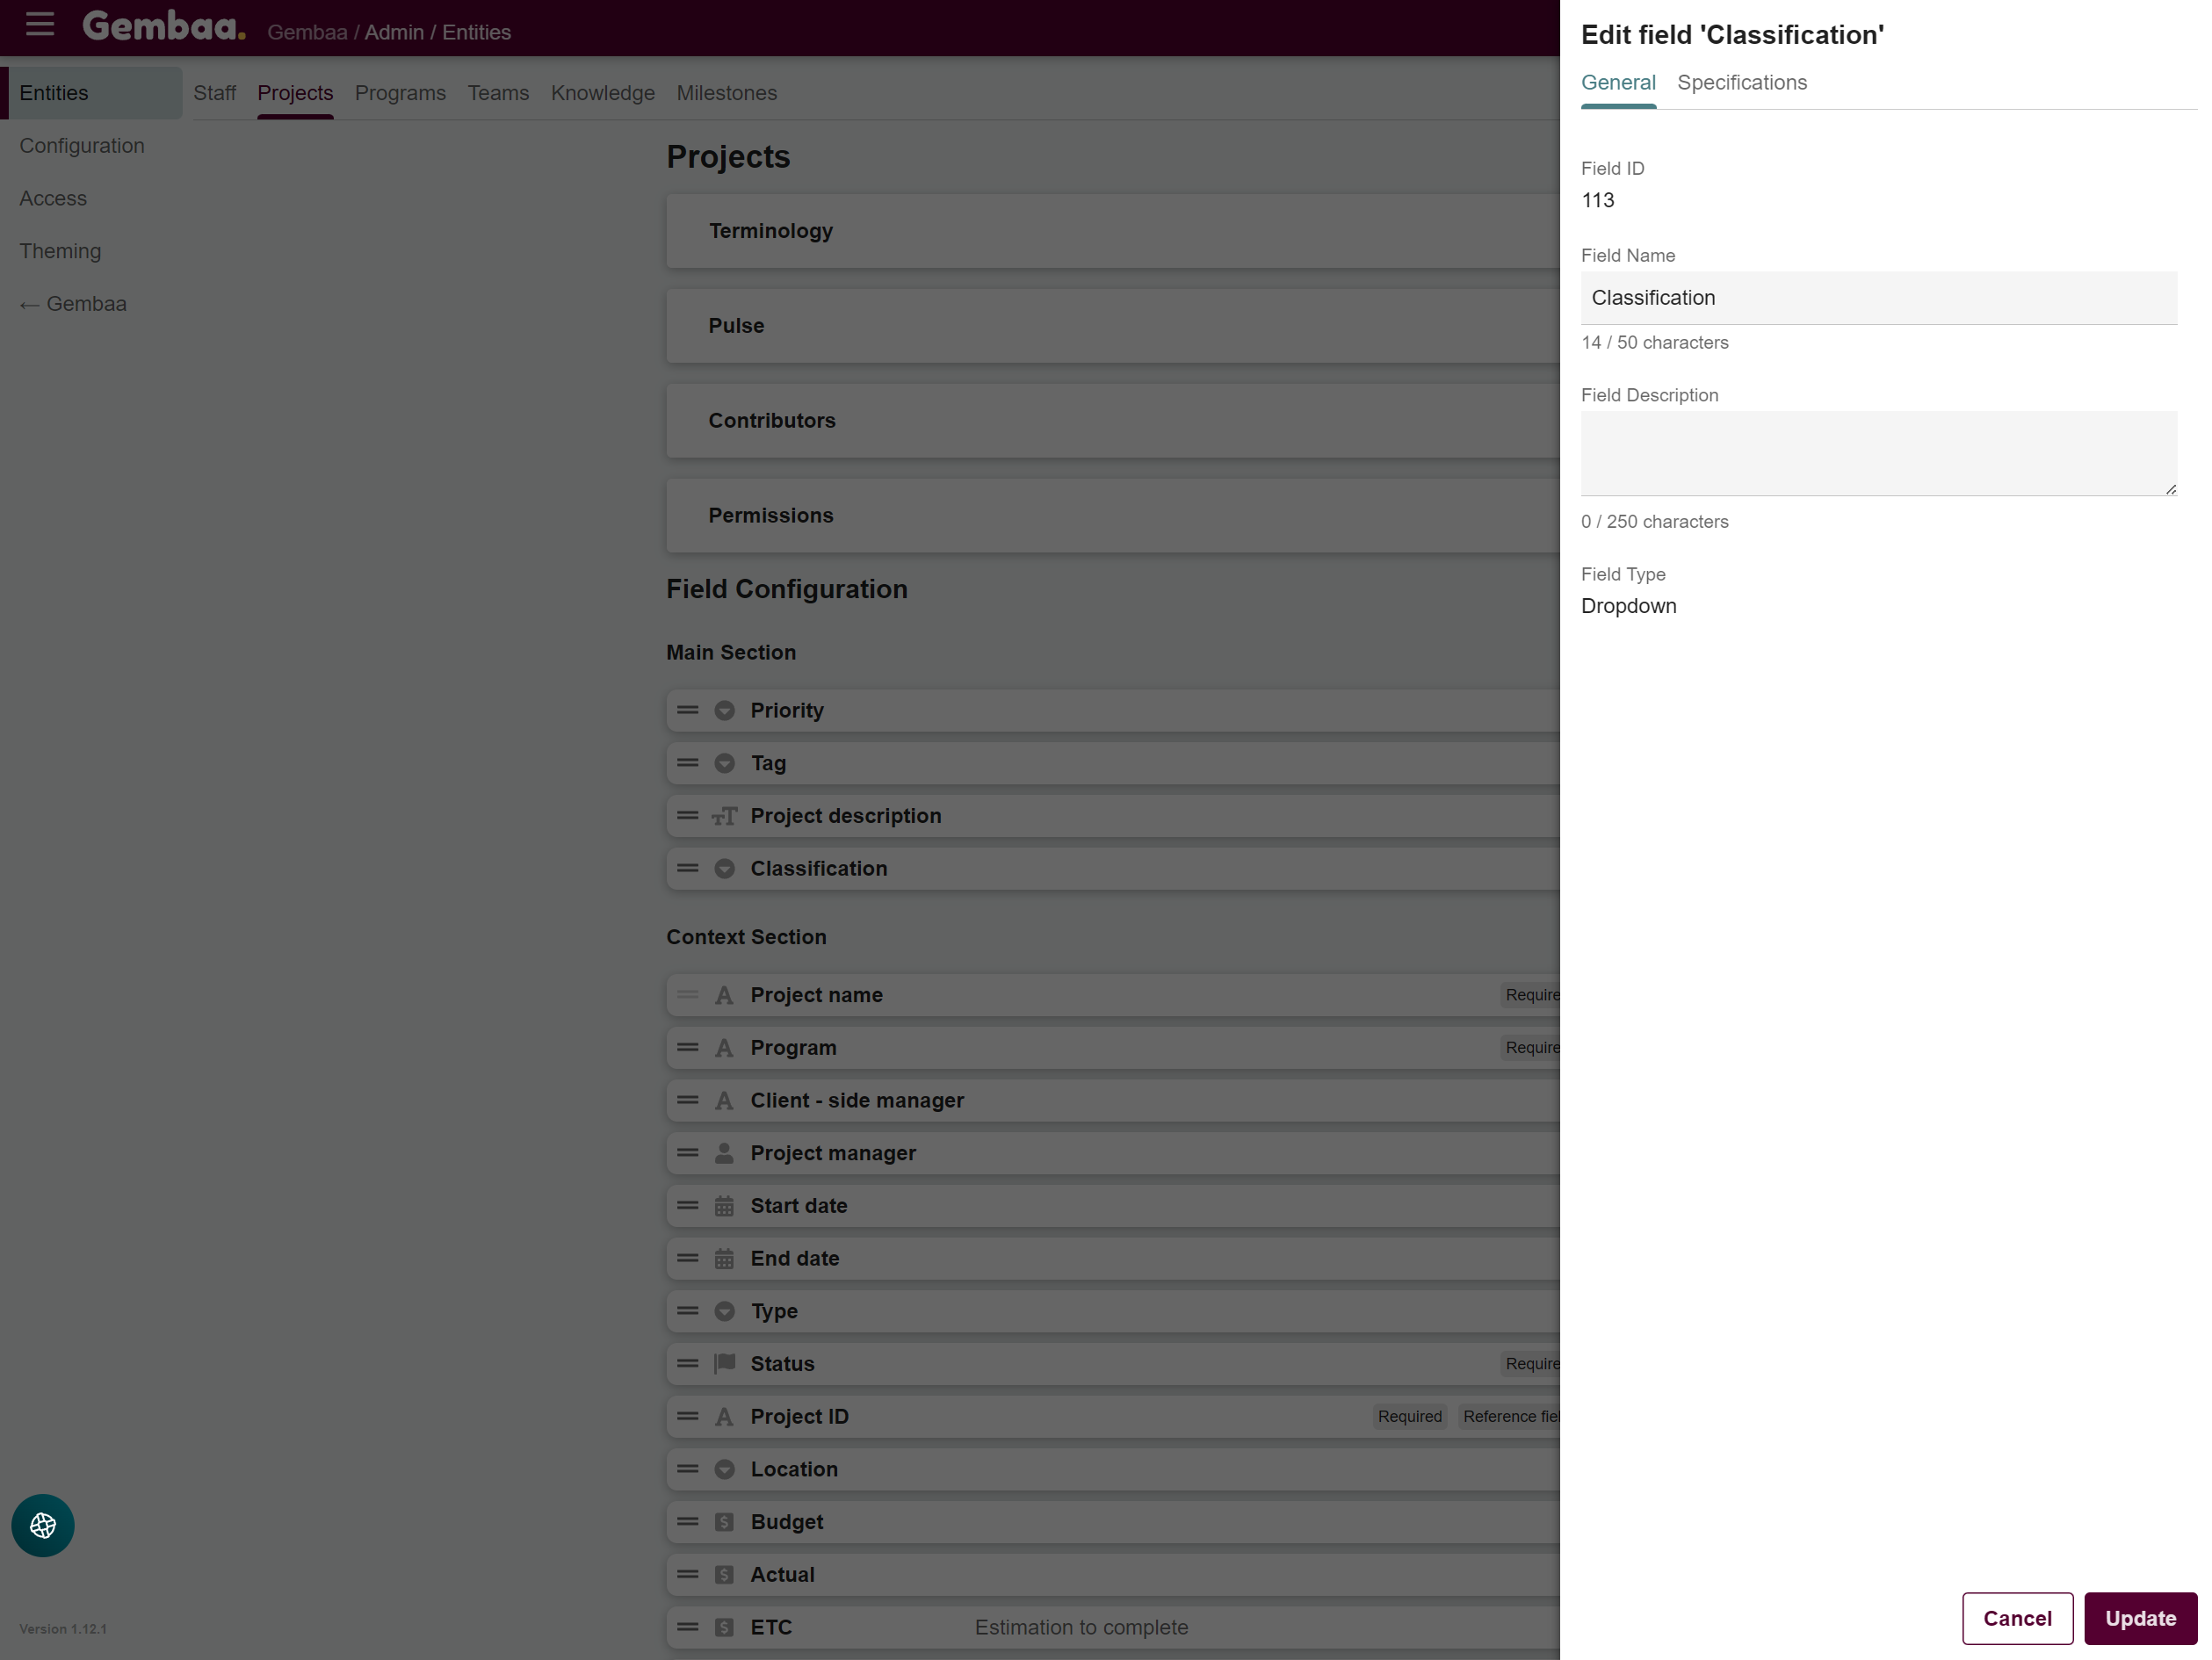
Step 5: Configure your custom field
A side panel should display with configuration options, such as the following:
General
- Field name - The label that will be displayed to users
- Field description - Additional context or guidance to help users understand what the field is for
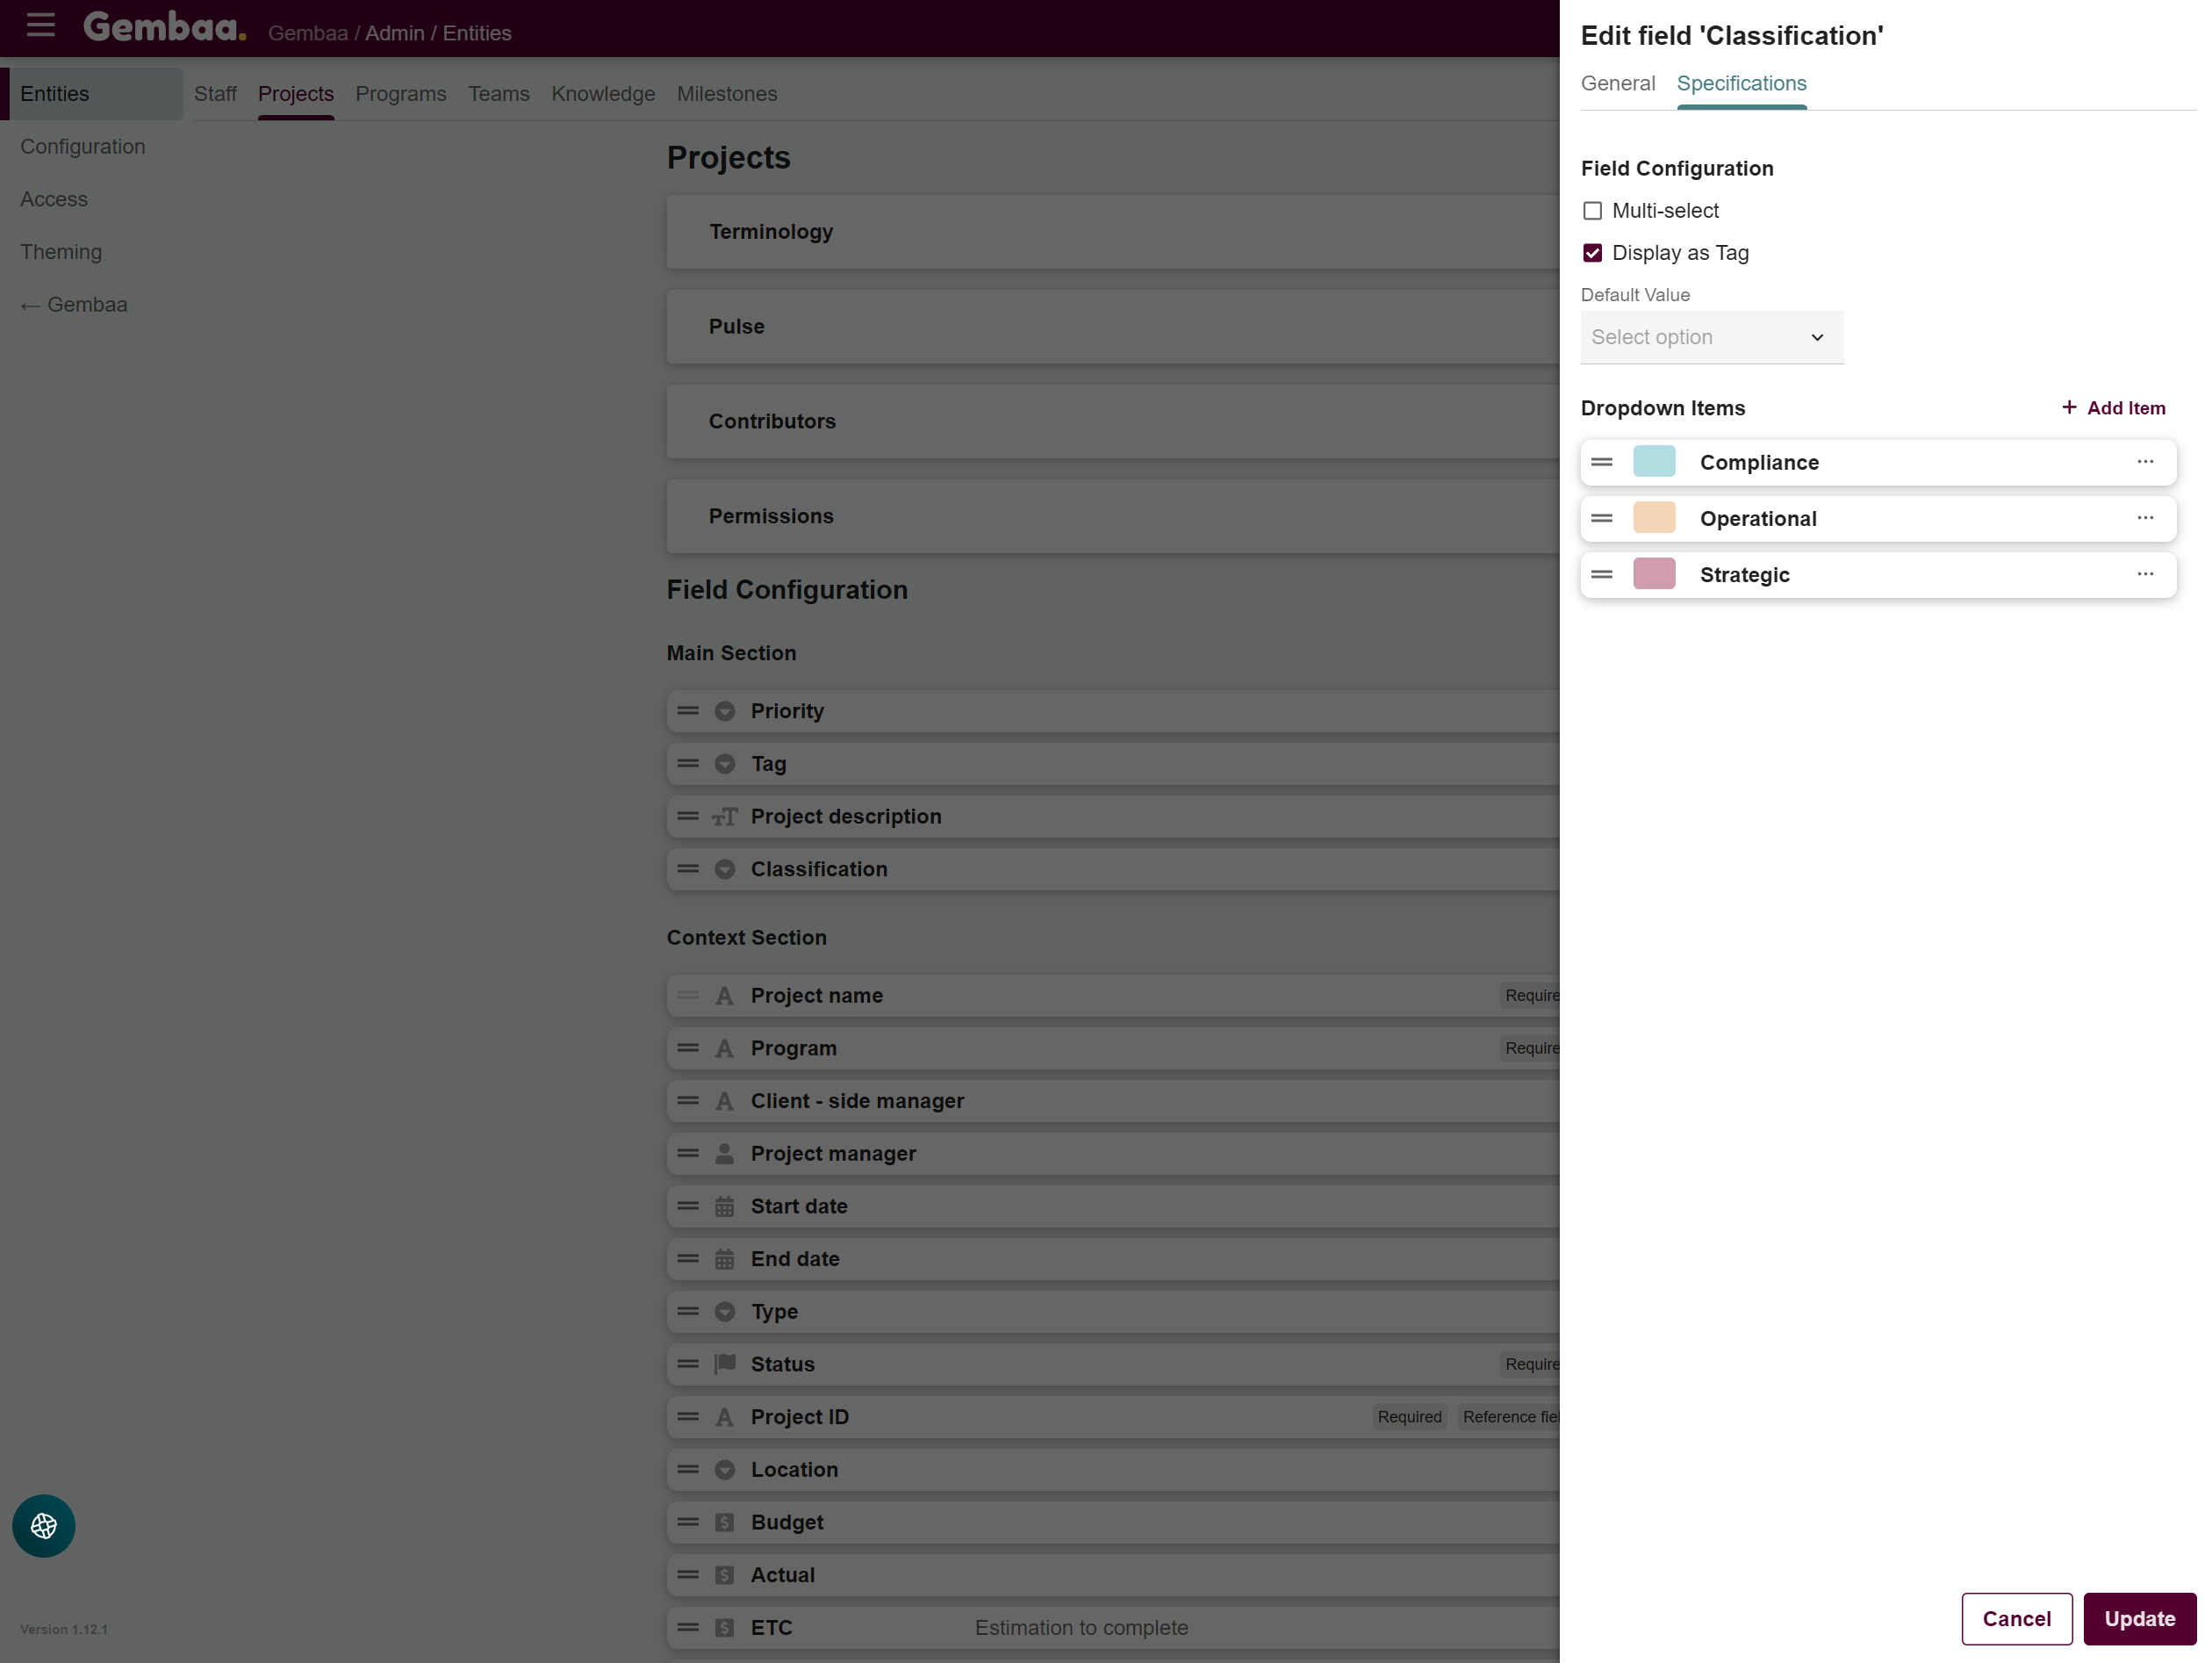
Specifications (may vary depending on field type)
- Multi-select - Allows selecting multiple options
- Display as tag - Shows valkues as tags instead of plain text
- Default value - preselect a value
- Dropdown items - Add items/choices for the field and optionally assign colors to each item (useful for tags and visual clarity)
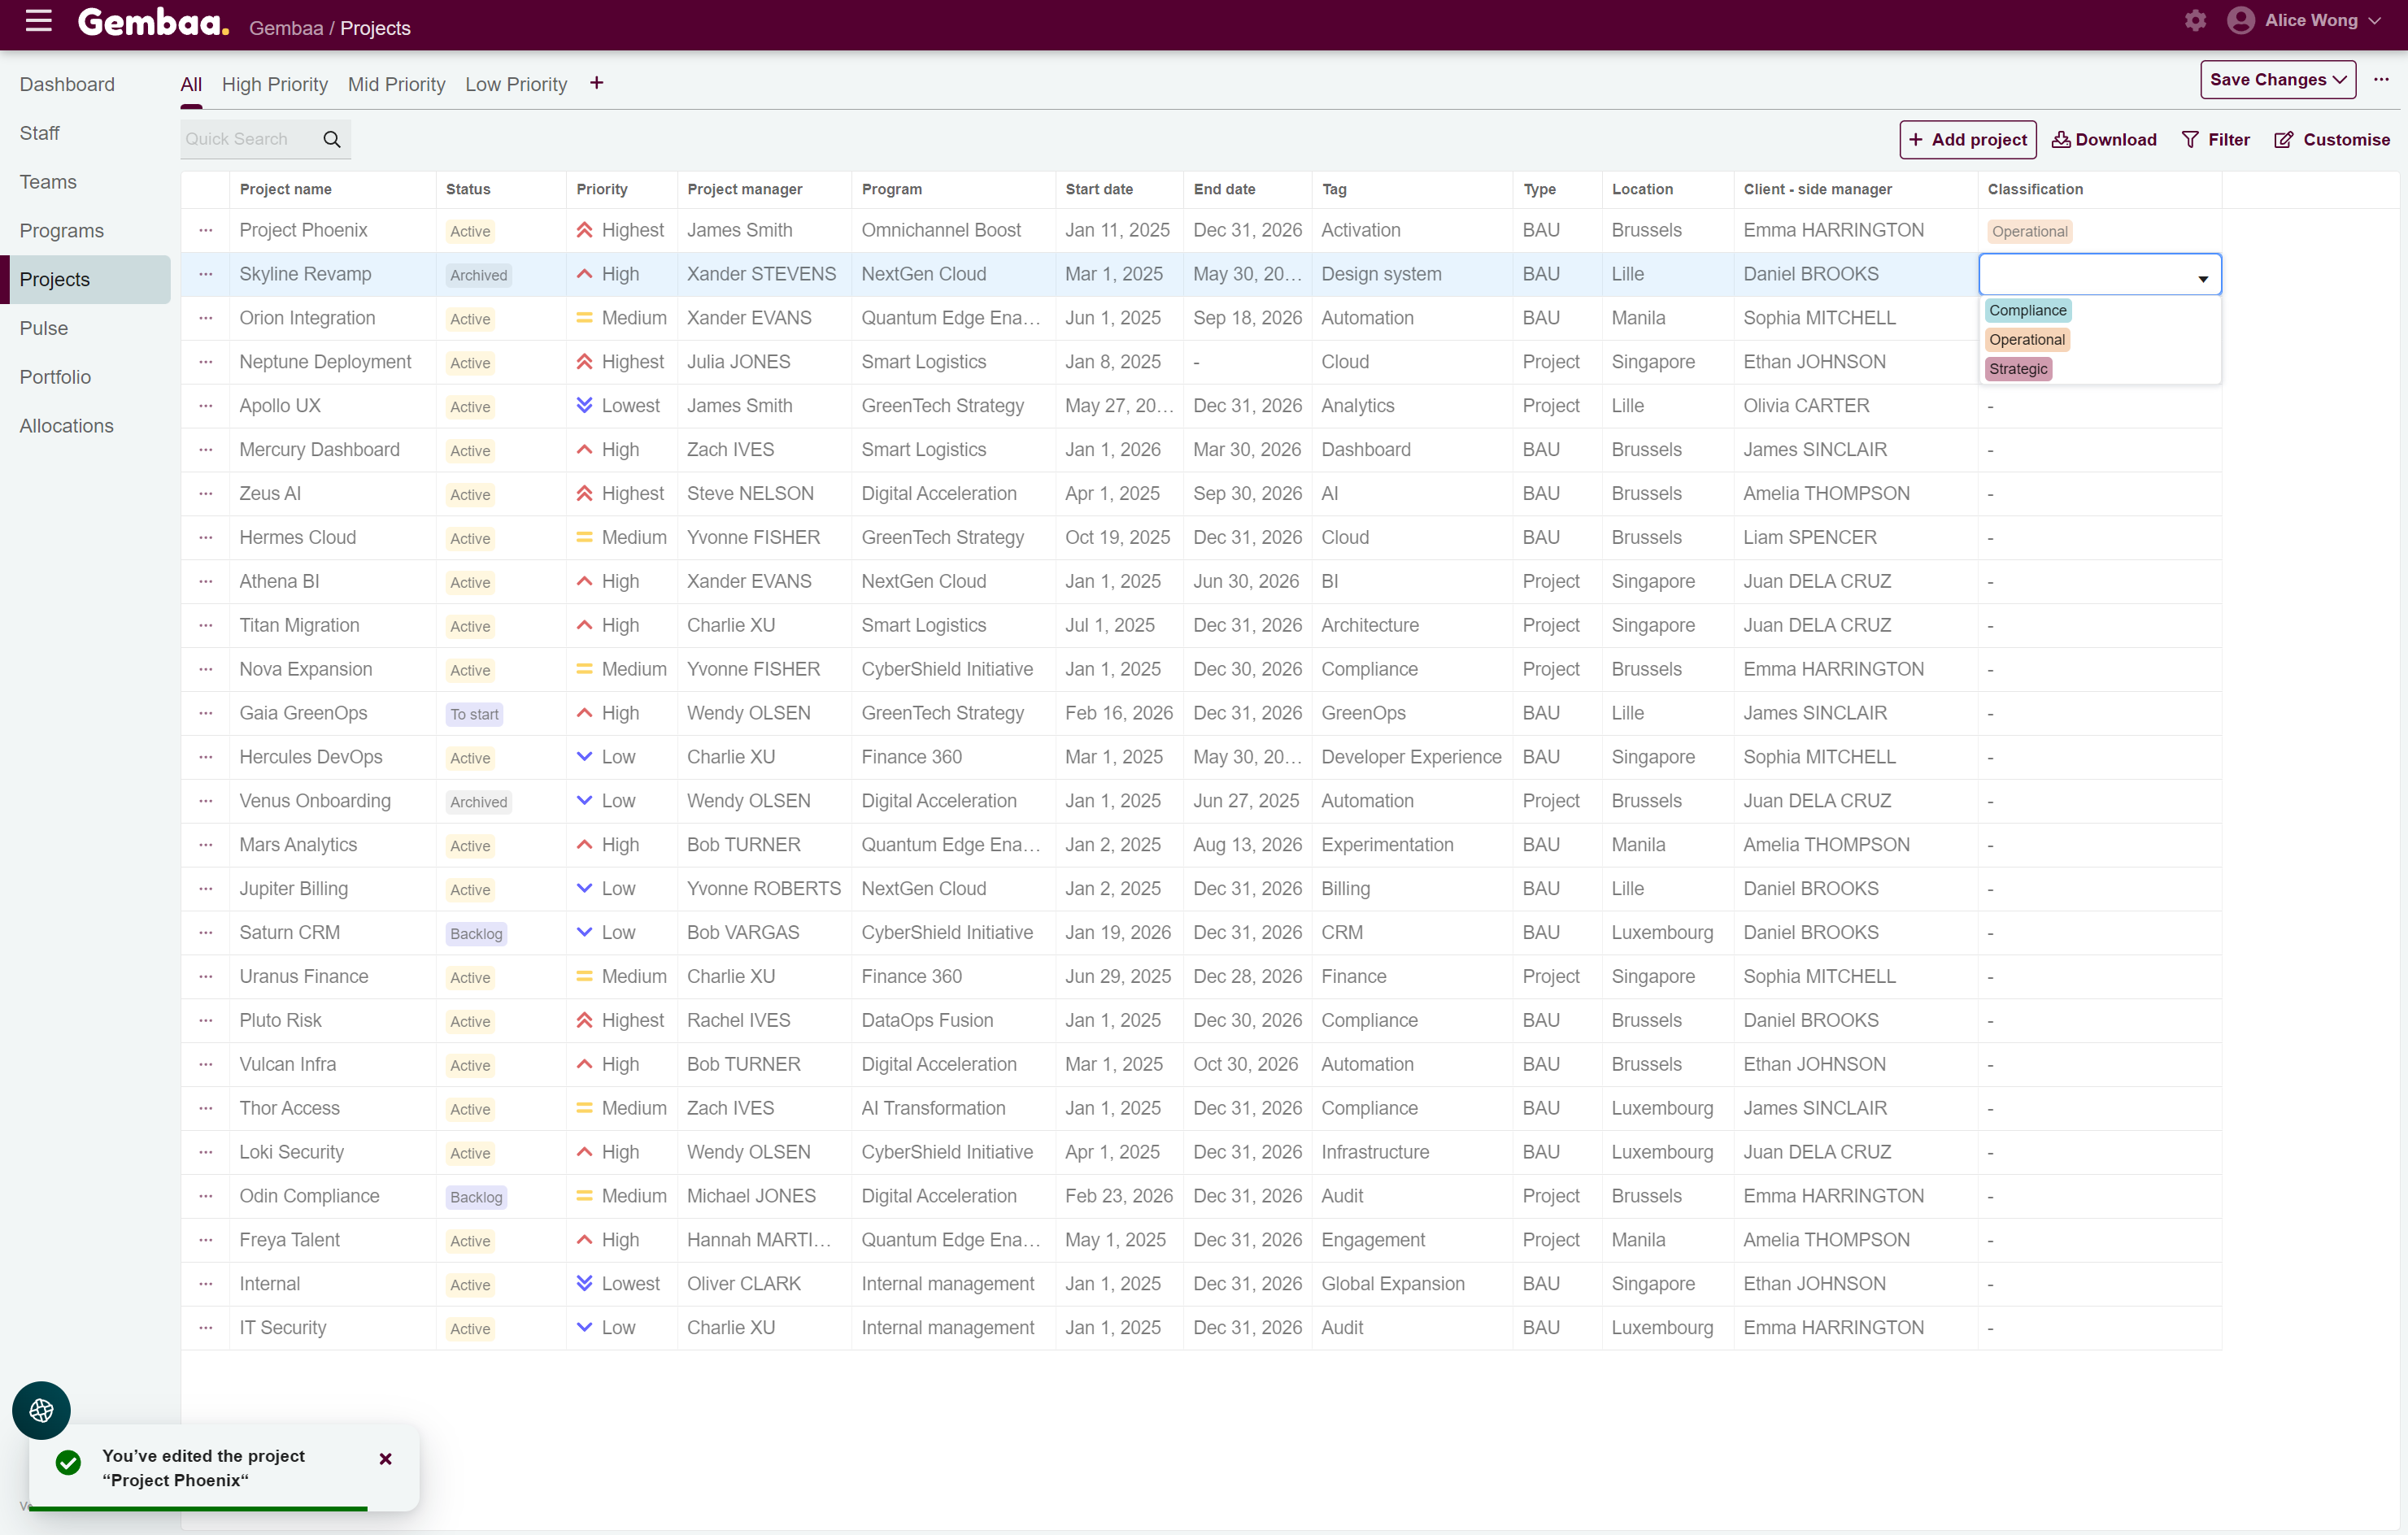
Step 6: Use the custom field
After configuring the custom field, return to Gembaa and navigate to the Projects module. In the right-most or last column on display, the new custom field will now be visible and you can start editing your records.
Step 7: Manage your fields
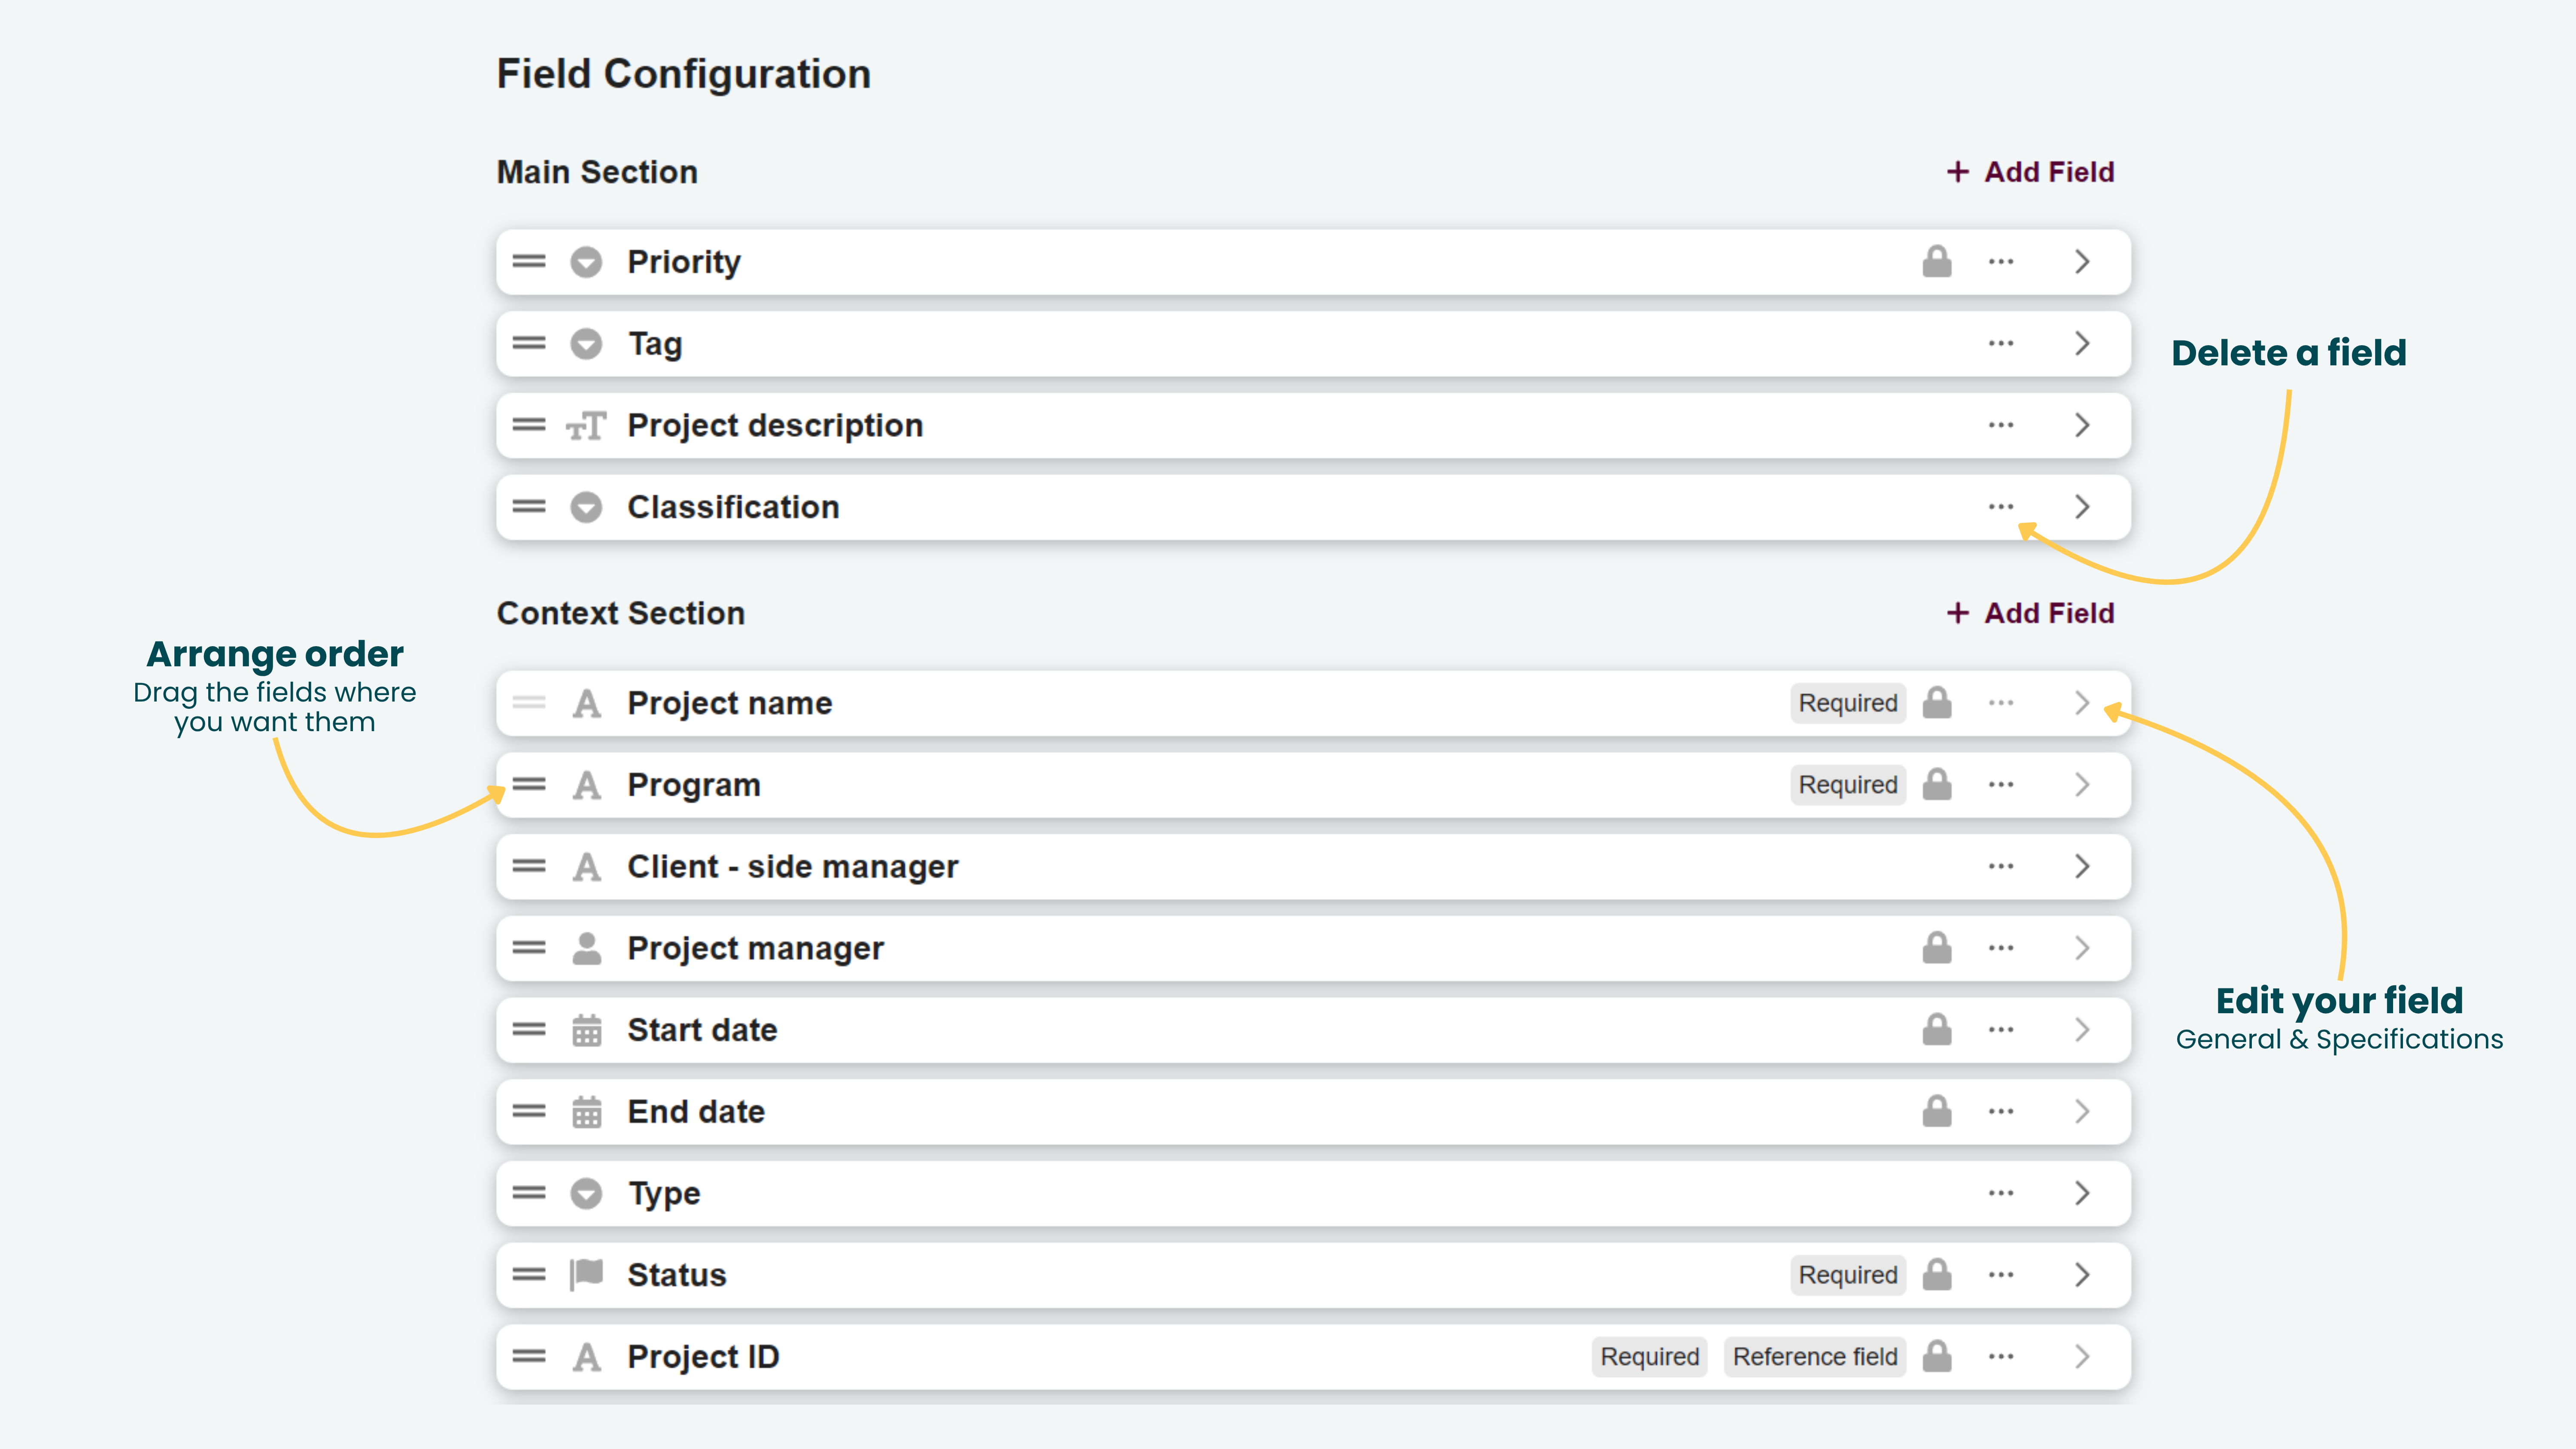
You can manage your fields by returning to the Field Configuration section.
From here, you can:
- Arrange order – Drag and drop fields to change their order or move them between the Main and Context sections
- Edit your field – Click the ">" icon on the right of a field name to update its general settings or specifications
- Delete a field – Click the ellipsis (…) icon on the right of a field name to remove a field